Are you tired of the outdated look of your kitchen table? Perhaps it’s time to give it A fresh And vibrant makeover with A new coat of paint. Painting your kitchen table is not only An affordable way to revamp your space, But it also allows you to unleash your creativity And customize the look according to your personal style. Whether you want to achieve A sleek modern aesthetic or add A pop of color for A more bohemian vibe, This article will guide you through the step-by-step process of how to paint a kitchen table. So grab your paintbrushes and let’s get started on transforming your dull dining area into a stunning focal point that reflects your unique taste!
What’s the best paint for a kitchen table?
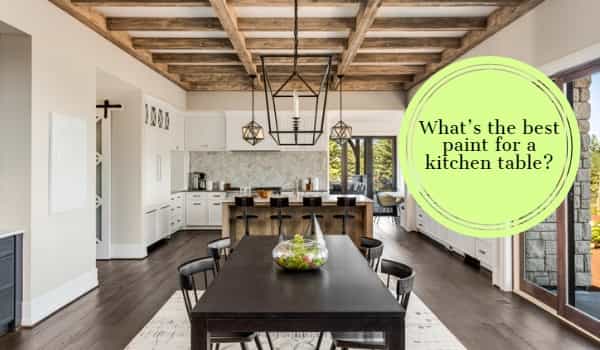
When choosing the best paint for a kitchen table, it is important to prioritize durability, resistance to stains and spills, and ease of cleaning. A high-quality latex or enamel paint specifically formulated for furniture or kitchen use is generally recommended. These types Of paint provide a durable finish that can withstand the daily wear and tear of A kitchen environment. Look for paints that have good adhesion properties And are resistant to chipping, peeling, And scratching. It is also advisable to opt for paints with a satin or semi-gloss finish, As they are easier to clean And offer better protection against moisture and stains. Before applying the paint, properly prepare the surface by sanding and priming it to ensure better adhesion and a smoother finish.
What kind of paint to use on a kitchen table

For painting a kitchen table, it is recommended to use durable and easily cleanable paint that can withstand the demands of a kitchen environment. Oil-based Or latex-based enamel paints are excellent choices as they provide A strong and long-lasting finish. Look for paints specifically formulated for furniture or kitchen use, as they are designed to resist stains, spills, and frequent cleaning. Opt for a satin or semi-gloss finish for better durability and easier maintenance. Before painting, ensure the table surface is properly cleaned, sanded, and primed to promote better paint adhesion and a smoother final result.
Oil-based paint Best Choice
When it comes to painting A kitchen table, Oil-based paint is often considered the best choice. Oil-based paints provide A durable and long-lasting finish that can withstand the demands Of a kitchen environment. They offer excellent adhesion, durability, and resistance to stains, spills, and frequent cleaning. Oil-based paint creates A hard and smooth surface that is resistant to chipping, scratching, And wear. It is particularly suitable for high-traffic areas such as kitchen tables. However, It’s important to note that oil-based paints typically have A longer drying time and require proper ventilation during application due to their strong odor And fumes.
Water-based paint Limited use

These can be used on A kitchen table, But their use may be limited compared to oil-based paint. Water-based paints, such as latex Or acrylic, offer advantages such as low odor, quick drying times, And easy clean up with water. They are generally safer To use due to their lower levels Of volatile organic compounds. However, Water-based paints may not provide the same level Of Durability And resistance to stains and wear as oil-based paints. They can be suitable for kitchen tables with less frequent use or for those who prioritize ease of application and environmental friendliness. It’s important to properly prepare the surface, apply multiple coats, and consider adding a protective topcoat to enhance the durability of water-based paint on a kitchen table.
Spray paint Limited use
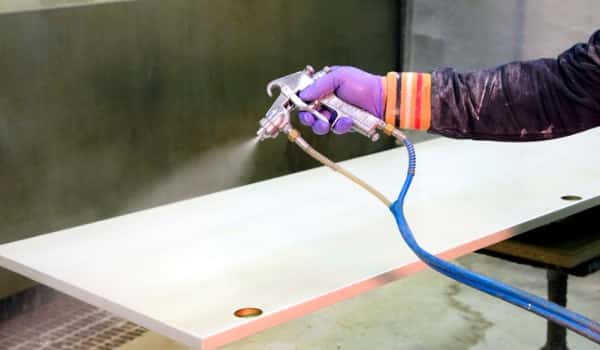
It can Be used on A kitchen table, But its use may be limited compared to traditional brush-on paints. Spray paint offers convenience and ease of application, especially for small or intricate surfaces on a kitchen table. It provides a smooth and even finish with no brush strokes. However, when it comes to larger areas or the entire table surface, spray paint may have limited coverage and control, resulting in potential uneven application or overspray. It is crucial to use spray paint in A well-ventilated area And follow proper safety precautions. Additionally, Spray paint may not offer the same level Of Durability And resistance to wear and tear as other types of paint. Therefore, it is advisable to consider brush-on paints, particularly oil-based or water-based options, for better adhesion and longevity when painting a kitchen table.
paint a kitchen table
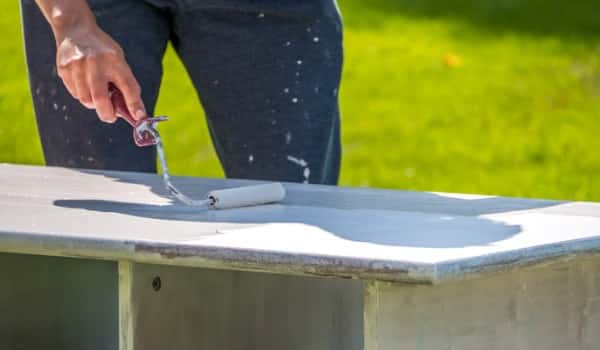
1. Choosing the right primer
Select a primer that is compatible with the material of your kitchen table. If the table is made of wood, choose a high-quality wood primer. For other surfaces like metal or laminate, opt for a primer designed for those specific materials. Apply the primer evenly over the entire surface, Following the manufacturer’s instructions. Allow the primer To dry thoroughly before moving on To the next step.
2. Choosing the right topcoat
Select a topcoat paint that suits your preferences and desired finish. Consider using durable And easy-to-clean paint, Such as oil-based paint Or water-based enamel paint. These options provide good adhesion and a protective layer. Choose a color that complements your kitchen decor. Apply the topcoat paint evenly using a brush or a roller, following the manufacturer’s instructions for application and drying times. Apply multiple coats if necessary, allowing each coat to dry fully before applying the next.
Can you paint a kitchen table without sanding?

While it is generally recommended to sand A kitchen table before painting to ensure better paint adhesion and A smoother finish, it is possible to paint A kitchen table without sanding, depending on the condition of the existing finish. If the table has a smooth and clean surface with no peeling or flaking paint, you can consider using a liquid deglosser or a bonding primer specifically designed to adhere to glossy surfaces. These products can help create a suitable surface for paint without the need for sanding. However, keep in mind that sanding provides the best results and promotes better paint adhesion. So it is still recommended whenever possible for optimal durability and finish.
Preparation To Painting

Clearing the table and creating a workspace
Remove any items, dishes, or decorations from the table and clear the surrounding area to create a clean and spacious workspace. This ensures that you have enough room to work comfortably and minimizes the risk of accidentally getting paint on nearby objects.
Cleaning and sanding the surface for better paint adhesion
Thoroughly clean the table surface to remove any dirt, grease, or old finish. Use A mild detergent or a suitable cleaner and A soft cloth Or sponge to ensure the surface is clean and free from debris. Next, consider sanding the table lightly using sandpaper or a sanding block. Sanding helps to create A slightly roughened surface, allowing the painting to adhere better And providing A smoother finish. After sanding, Make sure to remove any dust Or residue from the surface before proceeding with painting.
Paint Selection
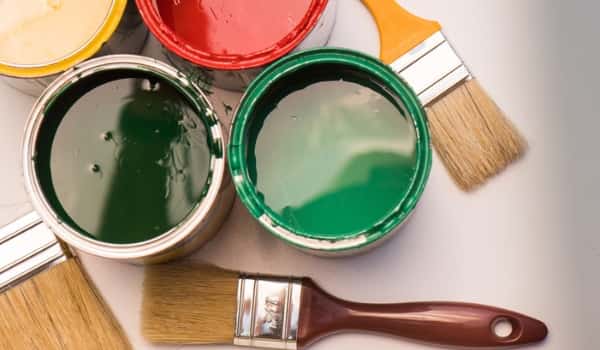
Choosing the appropriate paint type for the table material
Selecting the right paint type for your table material is crucial to ensure a successful and long-lasting paint job. Consider the specific characteristics And requirements Of the material to make an informed decision. For wooden tables, latex or acrylic paints are often recommended due to their durability and ease of use. They provide good coverage and dry quickly. Oil-based paints can be a suitable option for enhanced durability but may require more time for drying and proper ventilation during application. When it comes to metal tables, opt for paints specifically formulated for metal surfaces to ensure good adhesion and resistance against chipping and rust. Laminate or melamine tables require special attention, as these surfaces are smooth and non-porous. Look for paints explicitly designed for laminate or melamine, along with compatible primers to ensure proper adhesion and a long-lasting finish.
Selecting desired color or finish
The color and finish of your table can significantly impact the overall aesthetic and mood of the space. When choosing a color, consider the existing decor and color scheme in the room.
Select a paint color that complements or contrasts with the surroundings to create a cohesive and visually appealing look. It’s also helpful to test painting samples on a small area or a separate test surface to see how the color appears in different lighting conditions and whether it aligns with your preferences.
In terms of finishes, glossy or high-shine finishes provide a polished. And reflective look but may require more maintenance to keep them pristine. Matte or satin finishes offer a more subdued appearance and can be forgiving in terms of hiding minor imperfections and fingerprints.
Consider the desired level of sheen and the amount of maintenance you’re willing to put in when choosing the finish for your table. Ultimately, select a color and finish that resonates with your personal style and contributes to the overall ambiance you wish to create in your space.
Supplies and Tools

Gathering paintbrushes, rollers, drop cloths, and painter’s tape.
Depending on the condition Of your table and the type Of material you’re working with, You may need a primer. Primer helps create a smooth and even surface for the painting to adhere to, improves paint durability, and enhances color coverage. Choose a primer that is compatible with the type of paint you’ll be using and specifically formulated for the table material.
Acquiring primer and paint.
Select the appropriate paint type based on the material of your table (as discussed earlier). Look for paints labeled as suitable for the specific material, such as wood, metal, or laminate. Consider the desired finish (matte, satin, glossy) and choose A high-quality painting that provides good coverage And durability. Consider the color you have chosen And ensure that the paint is available in the desired shade or can be custom mixed to achieve the desired color.
Priming
Apply primer evenly on the table surface
When applying primer to the table surface, it is important to achieve an even and smooth coverage. Begin by using a paintbrush or roller to apply the primer in thin, even coats, working with the grain of the wood or using overlapping strokes. Make sure to cover the entire surface, including edges and corners. To ensure consistent adhesion and proper sealing of the table material. Take your time to apply the primer evenly, avoiding thick or drippy application, which can lead to an uneven finish.
Allowing sufficient drying time
After applying the primer to the table surface. It is crucial to allow sufficient drying time before proceeding with the next steps. This ensures that the primer fully dries and creates a strong bond with the table material. The drying time for the primer can vary depending on factors such As humidity, temperature, And the specific primer product used. It is best To refer to the manufacturer’s instructions for the recommended drying time. Avoid handling or disturbing the primer before it is completely dry to the touch to prevent smudging or damaging the primer coat. Patience during the drying process will contribute to a solid foundation for the paint and help achieve a professional and long-lasting finish on your table.
Painting

Applying paint in smooth and even strokes
Applying paint in smooth and even strokes and applying multiple coats as needed. The first step is to ensure the paint is applied in smooth, Controlled strokes to achieve A professional finish. This requires using the right tools, such as high-quality brushes or rollers. And employing proper techniques like starting with a “W” or “N” pattern, maintaining consistent pressure, and working in small sections. By doing so, you can ensure an even distribution of painting and avoid streaks or visible lines.
Applying multiple coats as needed
Depending on the type of paint, The color. And the desired opacity, multiple coats may Be required to achieve the desired result. Each coat should be applied once the previous one is fully dried. It’s essential to follow the recommended drying times provided by the paint manufacturer to prevent issues such as peeling or uneven drying. Applying multiple coats helps to build up the color intensity, improve coverage, and create a more durable and long-lasting finish. By patiently layering the painting and allowing sufficient drying time between coats. You can achieve a beautifully finished surface that meets your aesthetic goals.
Finishing
Inspect for touch-ups or uneven areas
After inspecting the surface for any touch-ups or uneven areas. It’s time to address them before proceeding to the final step. Carefully examine the surface, Looking for any remaining imperfections such as scratches, dents. Or areas where the painting might be uneven. Use appropriate tools and techniques to fix these issues, ensuring a smooth and flawless appearance. This may involve sanding down rough spots, filling in gaps or holes. Or applying additional coats of paint to achieve a consistent color and texture. Take your time during this step to ensure that the surface is in its best possible condition before moving forward.
Applying a protective topcoat for durability
Once the touch-ups and repairs have been completed, it’s important to apply a protective topcoat to enhance the durability and longevity of the painted surface. The topcoat acts as A shield, protecting the underlying painting from daily wear and tear, As well as from potential damage caused by moisture, UV rays, Or other environmental factors. Choose A topcoat that is suitable for the type Of paint used and follow the manufacturer’s instructions for application. Apply the topcoat evenly and smoothly, using A brush, roller, Or sprayer as recommended. Allow the topcoat to dry completely according to the instructions, ensuring that it forms a strong and protective barrier over the painted surface. This final step will not only enhance the visual appeal Of the painted area but also ensure that it remains in good condition for An extended period.
Clean-up and Maintenance
Properly cleaning brushes and tools.
After completing the painting project, it’s essential to properly clean the brushes and tools used. Start by removing excess paint from the brushes by scraping them against the rim of the paint can or a newspaper. Then, rinse the brushes with warm water or A suitable cleaning solution, depending on the type Of paint used. Gently massage the bristles to remove any remaining paint, working from the base to the tips. Repeat this process until the water runs clear. Finally, reshape the bristles And allow the brushes to dry completely before storing them in A clean and dry place. Properly cleaning and maintaining your brushes will extend their lifespan and ensure optimal performance for future painting projects.
Maintaining the painted table with gentle cleaning methods
To maintain the painted table, it’s important to use gentle cleaning methods to avoid damaging the painted surface. Regularly dust the table with a soft cloth or a feather duster to remove any surface debris or dust buildup. Avoid using harsh abrasives, rough sponges, or abrasive cleaning solutions that can scratch or strip the painting. Instead, opt for mild soap or a gentle cleaning solution mixed with warm water. Dampen a soft cloth with the solution, wringing out any excess moisture, and gently wipe the surface of the table. For stubborn stains, You can lightly scrub the area with A soft-bristle brush Or sponge. After cleaning, dry the table thoroughly with a clean, dry cloth. By using these gentle cleaning methods, you can maintain the beauty and integrity of the painted table for years to come.
The Final Thought
Painting a kitchen table can be a rewarding DIY project that can completely transform the look of your kitchen. By following these step-by-step instructions And tips, You can achieve professional-looking results. Remember to properly prepare the surface, choose the right painting and tools. Apply thin and even coats, and allow sufficient drying time between each coat. Don’t rush the process and take your time to ensure A flawless finish. So why not give it A try and add A fresh new look to your kitchen? Grab your paintbrush and get started today!


