

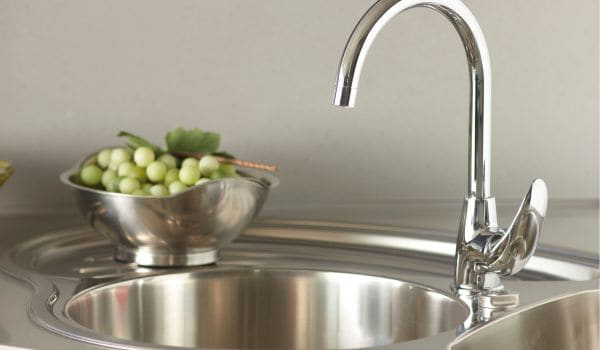
A well-functioning kitchen faucet is essential for the smooth operation of daily kitchen tasks, including washing dishes, preparing meals, and maintaining overall hygiene.
Whether you’re upgrading for improved functionality or aesthetics, installing a new kitchen can enhance the efficiency and appearance of your kitchen. In this guide, we’ll provide an overview of the installation process, guiding you through the necessary steps to ensure a successful and leak-free installation.
Whether you’re a seasoned DIY enthusiast or a first-time installer, following these steps will help you achieve a professional and reliable result.
Gather the Necessary Tools and Materials

List of Tools
Adjustable Wrench
Purpose
Tightening and securing nuts and bolts.
Importance
Enables adjustable grip for various-sized connections.
Plumber’s Tape
Purpose: Sealing threaded connections.
Importance
Prevents water leaks at pipe joints.
Plunger
Purpose
Handling unexpected plumbing issues.
Importance
It is useful for clearing minor blockages in the sink or drain.
Bucket
Purpose
Collecting water or debris during disassembly.
Importance
Keeps the workspace clean and minimizes mess.
List of Materials
New Kitchen Faucet
Purpose
Upgrading the existing for improved functionality or aesthetics.
Importance
The central component for water dispensing in the kitchen.
Plumber’s Putty
Purpose
Creating a water-resistant seal between the sink and faucet.
Importance
Ensures a secure, leak-free connection.
Flexible Supply Lines
Purpose
Connecting the to the water supply pipes.
Importance
Allows for easier installation and adjustment, reducing stress on plumbing connections.
Gathering these tools and materials in advance will streamline the installation process, making it more efficient and minimizing the chances of interruptions or complications. Ensure that you have everything readily available before starting, providing a smoother experience and a reliable, long-lasting kitchen installation.
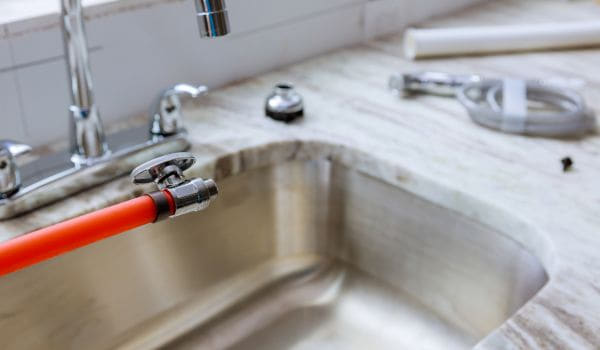
Turn Off the Water Supply

Locate Water Shut-Off Valves
To begin the installation process, locate the water shut-off valves beneath the sink. Typically, these valves are located on the pipes leading to the. Turning off the water at these valves is crucial for a safe and mess-free installation.
Turn off the hot and Cold Water Supply
Identify the valves corresponding to the hot and cold water supplies. Turn the valves clockwise to shut off the water flow. Confirm that the water is fully shut off by attempting to turn on the. This step prevents water spillage and ensures a controlled environment for the subsequent tasks.
Remove Old Faucet

Disconnect Water Supply Lines
Before removing the old one, disconnect the water supply lines connected to both the hot and cold water valves. Use an adjustable wrench to loosen the nuts securing the supply lines. Have a bucket ready to catch any residual water in the lines.
Loosen and Remove Mounting Nuts
Beneath the sink, locate the mounting nuts securing the old in place. Use the adjustable wrench to loosen and remove these nuts. This step may require some effort, so be patient and apply consistent pressure until the nuts are fully removed.
Lift and Remove Old Faucet
With the mounting nuts removed, lift the old carefully from the sink. Ensure any remaining water is drained into the bucket. Thoroughly clean the exposed area to prepare for the installation of the new.
Prepare Sink for New Faucet
Clean the Sink Surface
Wipe down the sink surface to remove any debris, grime, or old plumber’s putty. A clean surface ensures a proper seal and enhances the aesthetic appeal of the new.
Apply Plumber’s Putty (If Required)
If your new requires a seal between its base and the sink, apply the plumber’s putty around the faucet holes. This putty creates a water-resistant seal, preventing leaks and enhancing the stability of the new fixture.
By meticulously following these steps, you’ll successfully prepare your sink for the installation of the new faucet, ensuring a clean, secure, and leak-free result.
Install New Faucet
Insert Faucet Through Mounting Holes
Begin the installation of your new one by carefully inserting it through the mounting holes on the sink. Ensure proper alignment, and if applicable, follow any specific instructions provided by the manufacturer for your particular model.
Secure Faucet with Mounting Nuts
Underneath the sink, secure the in place by tightening the mounting nuts. Use an adjustable wrench to ensure a snug fit. Be cautious not to overtighten, as it may damage the or sink.
Connect Water Supply Lines
Reconnect the water supply lines to the corresponding hot and cold water valves. Use an adjustable wrench to secure the nuts onto the threaded connections. Ensure the connections are tight to prevent any water leakage.
Apply Plumber’s Tape to Threaded Connections
Wrap the plumber’s tape around the threaded connections of the water supply lines. This tape creates a watertight seal, reducing the risk of leaks at these crucial junctions. Ensure the tape is wrapped clockwise to match the direction of the threading.
Check for Leaks
Turn On the Water Supply
Gradually turn on the hot and cold water supply valves. Monitor the closely to check for any initial signs of leakage. If you notice any water escaping from the connections, immediately turn off the water supply and address the issue.
Inspect for Leaks Around Connections
Thoroughly inspect all connections, including those at the water supply lines and the base of the. Look for any water droplets or moisture, which may indicate a leak. Pay special attention to the plumber’s tape and ensure it forms a secure seal.
Tighten Connections If Necessary
If leaks are detected, use the adjustable wrench to tighten the affected connections. Be cautious not to overtighten, as this can damage the plumbing components. Repeat the testing process until no leaks are present.
By following these installation steps and conducting a meticulous leak check, you’ll ensure the successful integration of your new kitchen, providing a reliable and functional upgrade to your kitchen space.
Test Faucet Functionality
Test Hot and Cold Water
Turn on both the hot and cold water handles to verify the proper functioning of the. Allow water to flow for a few moments to clear any air from the lines. Check for consistent temperature control, ensuring that hot and cold water is dispensed as expected.
Check for Proper Water Flow
Observe the water flow from the spout to confirm that it is steady and without interruptions. Test the flow at different pressure levels to ensure the meets your preferences and functional requirements.
Confirm Smooth Operation of Handles and Spout
Operate the handles and spout to ensure smooth and responsive movement. Check for any unusual resistance or stiffness. Verify that the handles and spout return to their original positions without any lingering drips.
Final Adjustments
Align Faucet Properly
Ensure that the is aligned correctly with the sink and that it complements the overall aesthetics. Make any necessary adjustments to achieve a balanced and visually pleasing installation.
Tighten Any Loose Connections
Inspect all connections, including those at the water supply lines and mounting nuts. If any connections have become loose during testing, use an adjustable wrench to secure them, preventing potential leaks in the future.
Clean Up Any Excess Plumber’s Putty
Wipe away any excess plumber’s putty that may have squeezed out during the installation process. Use a damp cloth to clean the area around the base of the, leaving a polished and tidy appearance.
Completing these final checks and adjustments ensures that your new kitchen faucet not only looks appealing but also functions seamlessly. Take the time to test and fine-tune the installation, addressing any issues promptly to guarantee a long-lasting and trouble-free experience with your upgraded faucet.
Maintenance Tips
Regularly Check for Leaks
Periodically inspect all connections, including those at the water supply lines and the base of the faucet, for any signs of leaks. Address any issues promptly to prevent water damage to the surrounding area and to maintain the efficiency of your kitchen faucet.
Clean Faucet Aerator
Remove and clean the aerator at regular intervals to ensure optimal water flow. Over time, mineral deposits can accumulate and affect the flow rate. Soak the aerator in vinegar to dissolve these deposits and restore the performance.
Address Issues Promptly to Prevent Damage
If you notice any unusual sounds, dripping, or changes in water pressure, address these issues promptly. Timely intervention can prevent minor problems from escalating into more significant and costly damage. Regular maintenance ensures the longevity and reliability of your kitchen faucet.
Conclusion
The successful installation of a new kitchen not only enhances the functionality and aesthetic appeal of your kitchen but also requires consistent maintenance for prolonged performance. Regularly checking for leaks, cleaning the aerator, and promptly addressing any issues are key components of responsible ownership.
By following the outlined maintenance tips, you’ll ensure the continued efficiency of your and prevent potential damage to your kitchen and plumbing infrastructure. Taking a proactive approach to maintenance not only extends the lifespan of your but also contributes to the overall well-being of your kitchen.


