
Knowing how to remove a kitchen faucet is a valuable skill for homeowners and DIY enthusiasts alike. Whether you’re upgrading your kitchen fixtures, making repairs, or simply undergoing a renovation, being proficient in faucet removal can save both time and money. The ability to dismantle a kitchen faucet is crucial for accessing and repairing components such as cartridges, stems, or O-rings that may be causing leaks or other issues.
Additionally, it provides the flexibility to replace an old faucet with a new one, enhancing the aesthetic appeal of the kitchen. Before embarking on this task, it’s essential to familiarize yourself with the basic tools required, including an adjustable wrench, pliers, and basin wrench, as having the right tools ensures a smoother and more efficient removal process.
Preparation

Turn off the Water Supply
To initiate the removal process, it’s imperative to prioritize safety by shutting off the water supply. Locate the hot and cold water shut-off valves beneath the sink and turn them clockwise until fully closed. This precautionary step prevents potential water leakage during the faucet removal.
Empty Sink and Clear Workspace
Create a conducive work environment by clearing the sink of any dishes, utensils, or items. This step not only provides ample space for maneuvering but also minimizes the risk of damage to personal belongings. A clutter-free workspace contributes to a more efficient removal process.
Gather the Necessary Tools and Materials
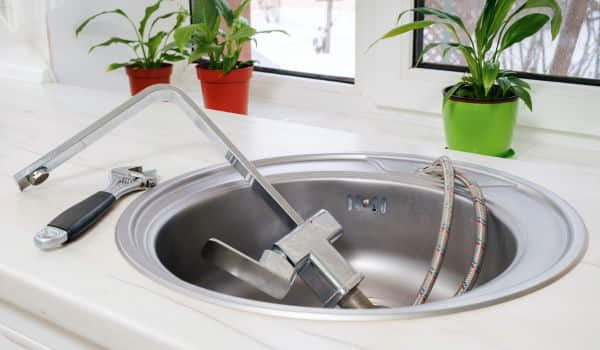
Before commencing the removal, gather the essential tools and materials. Equip yourself with an adjustable wrench, pliers, and a basin wrench to facilitate the task. Having these tools readily available ensures a smooth and hassle-free removal experience. Additionally, consider having a bucket or towels on hand to manage any residual water in the plumbing lines. Preparedness with the right tools is key to a successful kitchen faucet removal.
Identify Faucet Type
Different Types of Kitchen Faucets
Understanding the various types of kitchen faucets is essential for a successful removal process. Common types include single-handle, double-handle, pull-out, and pull-down faucets. Each type may have unique components and removal procedures, making it crucial to identify your specific faucet type before proceeding.
Determine the Specific Type of Your Faucet
Carefully examine your kitchen to determine its type. Refer to the manufacturer’s documentation or online resources if needed. This identification step ensures that you follow the correct removal procedure for your particular, avoiding potential complications.
Disconnect Water Supply Lines
Turn off the Hot and Cold Water Supply Valves
Once the type is identified, the next step is to turn off the hot and cold water supply valves. Locate these valves beneath the sink and rotate them clockwise until fully closed. This prevents water flow during the removal process, reducing the risk of leaks and making the task more manageable.
Use Adjustable Wrench to Disconnect Water Supply Lines
With the water supply turned off, use an adjustable wrench to disconnect the water supply lines from the. Carefully loosen and remove the nuts connecting the lines to the valves. This step ensures a safe and controlled disconnection, allowing you to proceed with the subsequent phases of the removal process.
Remove Faucet Handle
Locate and Remove the Decorative Cap
The initial step in removing a kitchen involves uncovering and accessing the internal components. For a decorative cap covering the handle attachment point, carefully locate and remove this cap. Use a flathead screwdriver or a similar tool to gently pry off the cap without causing damage. This reveals the screw securing the handle to the body.
Unscrew and Remove the Handle
Once the decorative cap is off, use an appropriate screwdriver to unscrew the handle from the assembly. In some cases, the screw might be located beneath a cover or decorative plate. Remove any additional elements to access the screw. With the screw removed, gently lift and detach the handle from the body. This step exposes the cartridge or stem assembly, the heart of the mechanism.
Expose the Cartridge or Stem Assembly
After removing the handle, you will encounter the cartridge or stem assembly, depending on your type. This component is responsible for controlling water flow and temperature. To fully expose the cartridge or stem, you may need to remove a retaining nut or clip securing it in place. Utilize the appropriate tools, such as pliers or a wrench, to carefully dismantle any retaining mechanisms and expose the crucial internal parts.
Remove Cartridge or Stem Assembly
Use Appropriate Tools to Loosen and Remove the Cartridge or Stem
With the cartridge or stem assembly now accessible, employ the necessary tools to loosen and remove it from the body. Different types may require specific tools, such as pliers or an adjustable wrench. Carefully grip the cartridge or stem and rotate it counterclockwise to loosen it from its housing. Exercise patience, as some assemblies may be tightly secured.
Inspect for Any Damage or Corrosion
Once the cartridge or stem is detached, take a moment to inspect it thoroughly. Check for any signs of damage, wear, or corrosion. Damaged components may be the cause of leaks or other issues. If you notice any deterioration, consider replacing the cartridge or stem with a suitable replacement part. Additionally, inspect the interior of the body for debris or mineral buildup that might affect performance.
A thorough examination during the removal process allows for proactive maintenance and troubleshooting. Identifying and addressing any issues with the cartridge or stem at this stage can save you from potential problems down the line. Regular inspections and maintenance contribute to the longevity and optimal performance of your kitchen.
By following these steps with care and attention to detail, you not only gain access to the internal components for repairs or replacement but also set the stage for a seamless installation of a new if necessary. Always refer to the manufacturer’s guidelines for specific instructions pertaining to your model, and exercise caution to avoid any damage during the removal process.
Loosen and Remove Mounting Nuts
Locate and Loosen the Mounting Nuts Securing the Faucet to the Sink
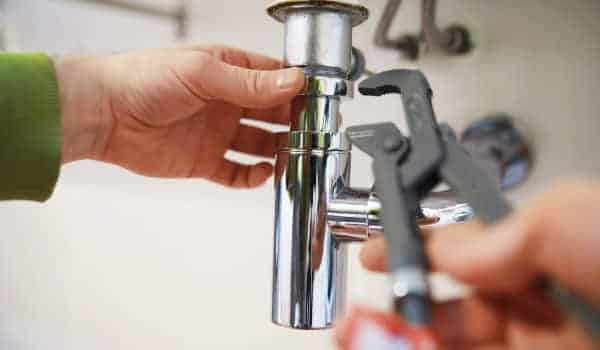
With the internal components exposed and detached, the next crucial step in removing a kitchen involves disengaging it from the sink. Begin by identifying the mounting nuts securing the in place. These nuts are typically located beneath the sink, fastening the to the countertop or sink deck. Using an appropriate tool, such as a wrench or pliers, carefully locate and loosen these nuts. Keep in mind that some may have additional securing mechanisms like screws or clips, so inspect the area thoroughly before proceeding.
Use Basin Wrench if Necessary
In certain cases, especially when working in confined spaces beneath the sink, a basin wrench becomes an invaluable tool. Its elongated, adjustable handle and swiveling jaw design enable easier access to mounting nuts that might be challenging to reach with conventional tools. If the space beneath the sink is limited, employing a basin wrench provides a more ergonomic and efficient means of loosening and removing the mounting nuts.
Lift and Remove Faucet
Lift the Faucet Assembly from the Sink
Once the mounting nuts are loosened and free, the is ready to be lifted from its position on the sink. Grasp the body firmly, ensuring a secure hold, and lift it upward. Exercise caution to avoid any sudden movements that may cause damage to the sink or other components. Depending on the design, you might need to wiggle it gently to release it from any remaining friction points.
Check for Any Remaining Components or Debris
With the removed, take a moment to inspect the sink area for any remaining components or debris. Check for stray mounting nuts, screws, or other small parts that may have become dislodged during the removal process. Clearing the area ensures a clean workspace for the subsequent steps and minimizes the risk of interference during the installation of a new, if applicable.
Clean and Inspect
Clean the Sink Area Where the Faucet Was Installed
Before proceeding with any further tasks, it’s essential to clean the sink area where the was installed. Use a mild cleanser and a non-abrasive sponge or cloth to remove any accumulated grime, mineral deposits, or residue. Pay special attention to areas around the holes and the immediate surroundings. A clean surface not only provides a more hygienic environment but also enhances the aesthetic appeal of the sink area.
Inspect the Removed Faucet for Any Issues
With the sink area cleaned, shift your focus to the removed. Thoroughly inspect all components for signs of wear, damage, or corrosion. Check the cartridge or stem, mounting hardware, and any other parts for potential issues. Identifying and addressing problems at this stage allows for proactive maintenance or replacement, ensuring optimal performance when reinstalling a new.
By adhering to these steps with diligence and care, you not only successfully uninstall the existing but also prepare the space for the installation of a new one, if necessary. Regular maintenance, cleanliness, and attention to detail contribute to the overall longevity and functionality of your kitchen fixtures. Always consult the manufacturer’s guidelines for specific instructions related to your model and exercise caution to prevent any damage during the removal process.
Installation of New Faucet (Optional)
Brief Overview of Installing a New Faucet
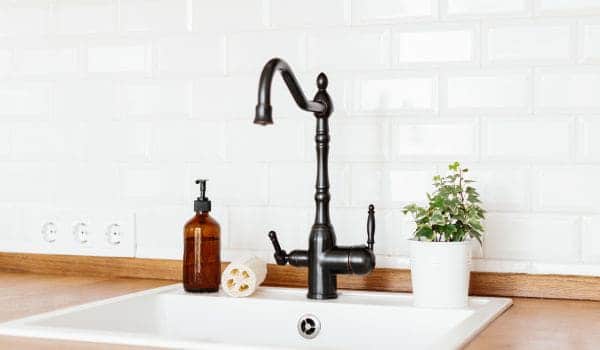
Installing a new kitchen can be a rewarding endeavor, offering an opportunity to update the look of your kitchen and enhance functionality. While the specific steps may vary depending on the model, a general overview provides insight into the installation process. Before beginning, it’s crucial to review the manufacturer’s instructions for your specific facet model, as they provide valuable guidance tailored to the product.
Basic Steps to Follow if Replacing the Old Faucet
Prepare the Workspace
Clear the sink area and ensure the workspace is clean and free of debris.
Turn off Water Supply
Shut off the hot and cold water supply valves beneath the sink.
Remove Old Faucet
Follow the steps outlined earlier to uninstall the old, ensuring a smooth and careful removal process.
Clean the Sink Area
Clean the sink surface thoroughly, removing any residues or debris from the previous faucet.
Install New Faucet
Place the new in the designated holes on the sink deck or countertop. Align them correctly, ensuring a secure fit.
Secure Mounting Hardware
From beneath the sink, secure the new in place using the provided mounting nuts or other securing mechanisms. Follow the manufacturer’s instructions for the specific installation requirements.
Connect Water Supply Lines
Attach the hot and cold water supply lines to the corresponding valves beneath the sink. Use an adjustable wrench to tighten the connections securely.
Install New Handle and Components
If the new includes a handle or additional components, follow the manufacturer’s instructions to attach and secure them properly.
Turn on Water Supply
Gradually turn on the hot and cold water supply valves to restore water flow. Check for any leaks around the connections.
Test and Adjust
Test the new for proper functionality, including water temperature control and flow. Make any necessary adjustments to ensure optimal performance.
Inspect for Leaks
Conduct a final inspection for leaks, both above and below the sink. Address any issues promptly to prevent water damage.
Conclusion
The process of removing and installing a kitchen involves a series of systematic steps to ensure a smooth transition. From turning off the water supply and dismantling the old to cleaning the workspace and inspecting the new installation, attention to detail is paramount. Whether you are replacing an old for functional reasons or upgrading for aesthetic appeal, following manufacturer guidelines and best practices ensures a successful outcome. Regular maintenance and proactive care contribute to the longevity and efficient performance of your kitchen fixtures, providing you with a reliable and enjoyable culinary environment.