If you’re looking to update your kitchen faucet, the first step is to remove the old one. However, many people are intimidated by the thought of removing a kitchen faucet without a basin wrench. Fortunately, it’s possible to remove a kitchen faucet without this tool. In this article, we’ll go over the steps involved in remove a kitchen faucet without a basin wrench.
We’ll cover everything from gathering the necessary tools and materials to safely disconnecting your old faucet and installing your new one. Whether you’re an experienced DIYer or just starting out, our guide will help you successfully tackle this home improvement project. So let’s get started!
What Is A Kitchen Faucet?

A kitchen faucet, also known as a sink faucet or tap, is a device that controls the flow of water in a kitchen sink. It typically consists of a spout, handles or levers for controlling the temperature and flow of water and various internal mechanisms that regulate water pressure and mix hot and cold water.
Kitchen faucets are essential fixtures in a kitchen, allowing users to easily access and control water for activities such as washing dishes, preparing food, and filling pots and containers. They come in various styles, designs, and finishes to complement the overall aesthetics of the kitchen.
What Is A Basin Wrench?

A basin wrench is a specialized plumbing tool designed to remove or tighten nuts and bolts in hard-to-reach areas, particularly under sinks or basins. It features a long handle with a pivoting, adjustable jaw at one end. The jaw has a notched or toothed design that allows it to securely grip the nut or bolt while providing leverage for turning.
The long handle enables access to tight spaces, such as behind sinks or under cabinets, making it ideal for tasks like removing or installing faucets, supply lines, or other plumbing fixtures. A basin wrench is a valuable tool for plumbers and DIY enthusiasts, as it simplifies the process of working on plumbing connections in confined areas.
Can You Remove the Kitchen Faucet Without A Basin Wrench?
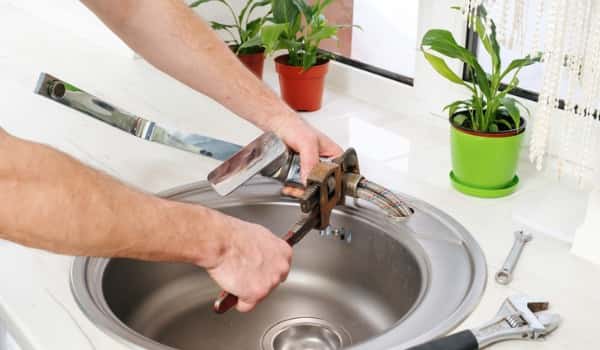
Yes, it is possible to remove a kitchen tap without using a basin wrench. While a basin wrench is a convenient tool specifically designed for this task, you can still accomplish the removal using alternative tools.
Adjustable pliers, such as slip-joint pliers or channel-lock pliers, can be used to loosen and disconnect the necessary nuts and bolts. Additionally, a flathead screwdriver may come in handy for removing handles or other components.
Though the process may require more effort and caution, it is entirely feasible to remove a kitchen tap without a basin wrench by employing these substitute tools.
Preparations

Gather necessary tools
Before attempting to remove a kitchen tap without a basin wrench, gather alternative tools that can be used such as adjustable pliers (slip-joint or channel-lock pliers) and a flathead screwdriver. These tools will help with loosening and disconnecting the necessary components.
Turn off the water supply
Locate the shutoff valves under the sink and turn them clockwise to shut off the water supply to the tap. This step is crucial to prevent any water leakage or damage during the removal process. Double-check that the water supply is fully turned off before proceeding further.
Disconnecting water supply lines

Loosen nuts connecting water supply lines
Use adjustable pliers to loosen the nuts that connect the water supply lines to the tap. Place the jaws of the pliers around the nut and turn counterclockwise to loosen it. If the nuts are tight or difficult to loosen, you can try spraying some penetrating oil on them and allowing it to sit for a few minutes before attempting to loosen them again.
Use adjustable pliers for additional leverage if needed
If the nuts are particularly stubborn and difficult to loosen by hand, you can use adjustable pliers for additional leverage. Position the jaws of the pliers around the nut and grip firmly.
With a steady grip, apply gentle pressure in a counterclockwise direction to loosen the nut. Be careful not to apply too much force as it may cause damage to the nut or water supply lines.
Removing faucet handles
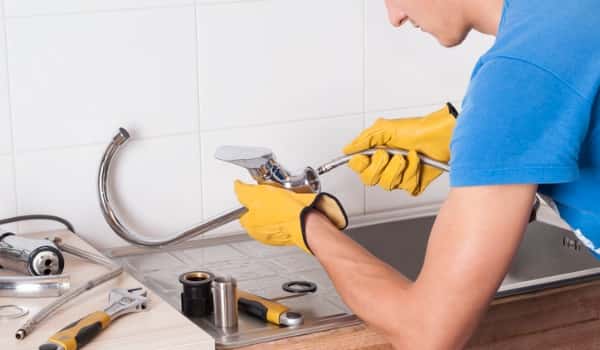
Look for screws or caps on handles
Examine the handles of the kitchen tap to identify if there are screws or caps securing them in place. Some handles may have visible screws on the top or underside, while others might have decorative caps covering the screws.
Use a flathead screwdriver to remove screws or pry off caps
If there are screws, use a flathead screwdriver that fits the screw head and turn them counterclockwise to loosen and remove them. If there are caps covering the screws, gently pry them off using the flathead screwdriver. Insert the screwdriver under the edge of the cap and apply gentle pressure to lift it off.
Lift-off handles
Once the screws or caps are removed, you should be able to lift off the handles. Hold the handle firmly and pull it straight up, using slight side-to-side movements if needed. If the handles are stuck, you can try applying a small amount of lubricant or tapping them gently with a rubber mallet to loosen them.
Removing the faucet spout

Locate the retaining nut underneath the spout
Look underneath the faucet spout and locate the retaining nut. It is typically a large, round nut securing the spout to the faucet body.
Use adjustable pliers to loosen and remove the nut
Position the jaws of the adjustable pliers around the retaining nut. Grip firmly and turn the nut counterclockwise to loosen it. Apply steady pressure until the nut is loose enough to remove by hand.
Lift off the spout carefully
Once the retaining nut is removed, you can carefully lift off the tap spout from the faucet body. Wiggle it gently from side to side while pulling upwards to detach it. Be cautious not to force or twist the spout too much to avoid any damage to the plumbing or surrounding area.
Removing the faucet body
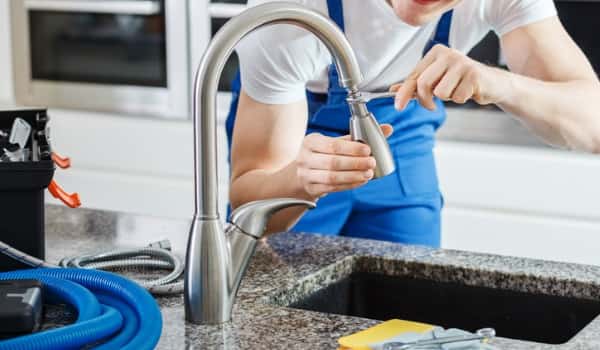
Locate mounting nuts underneath the sink
Look underneath the sink and locate the mounting nuts that secure the faucet body to the countertop or sink. These nuts are usually located near the base of the faucet.
Use adjustable pliers to loosen and remove the nuts
Position the jaws of the adjustable pliers around the mounting nuts. Grip firmly and turn the nuts counterclockwise to loosen them. Apply steady pressure until the nuts are loose enough to remove by hand. If the nuts are difficult to loosen, you can use penetrating oil and allow it to sit for a few minutes before attempting to loosen them again.
Lift the faucet body out of the sink
Once the mounting nuts are removed, you can lift the faucet body out of the sink. Gently lift it straight up, keeping it level to avoid any damage to the plumbing or surrounding area. Be mindful of any remaining water in the tap body and have a towel or bucket ready to catch any drips.
Cleaning and preparing for installation

Clean the area around the sink and faucet holes
Before installing a new faucet, it’s essential to clean the area around the sink and faucet holes. Remove any debris, residue, or old caulking. Use a mild detergent or a suitable cleaner along with a sponge or cloth to clean the surface thoroughly. Dry it completely before proceeding
Inspect and clean the old mounting surface
Examine the old mounting surface where the previous tap was installed. Remove any old putty, caulk, or adhesive using a putty knife or a scraper. Ensure the surface is smooth and free of any residue or debris. Wipe it clean with a cloth to ensure a clean and secure base for the new faucet.
Gather new faucet and installation materials
Before installing the new faucet, gather all the necessary materials and components. This includes the new faucet, supply lines, mounting hardware, and any additional items specified by the manufacturer. Ensure you have everything needed for a successful installation. Review the manufacturer’s instructions and any provided diagrams or guidelines to familiarize yourself with the specific installation requirements.
How To Maintain Your Kitchen Faucet

1. Daily maintenance
Regularly cleaning your tap is crucial to keep it looking clean and functioning well. After each use, wipe the faucet with a soft cloth or sponge to remove water spots, soap residue, and food particles. Avoid using abrasive cleaners that can damage the finish. Additionally, check for any leaks or dripping and address them promptly to prevent water wastage and potential damage.
2. Remove deposits
Over time, mineral deposits can accumulate on the aerator and other parts of the faucet, causing reduced water flow. To remove these deposits, unscrew the aerator from the tap spout using your hand or pliers. Soak it in a mixture of vinegar and water for a few hours to dissolve the mineral buildup. Then, use a brush or toothbrush to scrub away any remaining debris. Rinse the aerator thoroughly and reinstall it to restore proper water flow.
3. Replacing/ Cleaning Aerator
Regularly inspect the aerator for signs of clogging, damage, or reduced water flow. If it is clogged or damaged, cleaning it may not be effective, and replacement might be necessary. To clean the aerator, soak it in vinegar or a descaling solution, scrub gently with a brush to remove debris, and rinse thoroughly before reinstalling. If cleaning does not resolve the issue, consider replacing the aerator with a new one to ensure optimal water flow.
Why Do You Need To Remove The Kitchen Faucet?
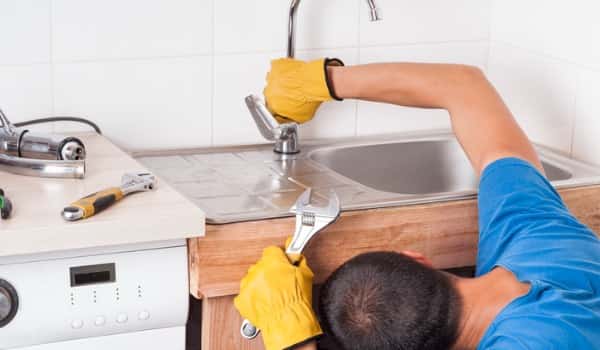
Design
If you want to upgrade or change the design of your kitchen, removing the existing faucet allows you to install a new one that matches your desired aesthetic. Updating the tap can enhance the overall look and feel of your kitchen.
Damage
If your current faucet is damaged or malfunctioning, removing it is necessary to replace it with a new one. Common issues include leaks, dripping, handle problems, or worn-out parts. Removing the damaged faucet allows you to assess the extent of the damage and replace any faulty components.
Blockage
Over time, mineral deposits, debris, or sediment can accumulate inside the faucet, leading to reduced water flow or clogged aerators. Removing the tap enables you to clean or replace the aerator and clear any blockages, restoring proper water flow.
Corrosion
Faucets exposed to moisture can experience corrosion, especially in areas with hard water. If your tap has significant corrosion, it may affect its performance and appearance. Removing the corroded faucet allows you to replace it with a new one and prevent further damage.
Is it possible to remove a kitchen faucet without any tools?

Removing a kitchen faucet without any tools is highly unlikely and challenging. Faucets are typically secured with mounting nuts or bolts that require significant force to loosen and remove. Without the use of tools such as a basin wrench, adjustable pliers, or screwdrivers, it would be nearly impossible to apply the necessary torque and grip to successfully remove the faucet. Having the right tools on hand is essential for a smooth and efficient faucet removal process.
Are there any household items that can serve as a makeshift basin wrench?
While it is generally recommended to use a proper basin wrench for removing a kitchen faucet, in some cases, you may be able to use certain household items as makeshift basin wrench alternatives. For example, if you have a pair of locking pliers or adjustable wrenches, they can provide some leverage for loosening and removing mounting nuts. Additionally, a thick rubber jar opener or a thick cloth wrapped around the nut can offer additional grip. However, it’s important to note that these makeshift options may not be as effective as a dedicated basin wrench and can potentially cause damage to the tap or surrounding area if not used carefully.
Can I use pliers to loosen the connections of a kitchen faucet?
Yes, you can use pliers to loosen the connections of a kitchen tap. Adjustable pliers or slip-joint pliers can provide the necessary grip and leverage to loosen the nuts or connections. However, it’s important to exercise caution and use the pliers carefully to avoid damaging the faucet or its components. Wrap the jaws of the pliers with a cloth or use a rubber jar opener for added grip and to protect the finish of the tap. It’s still recommended to use the appropriate tools, such as a basin wrench, for the best results, but pliers can serve as a makeshift option if necessary.
Are there any alternative methods to remove a kitchen faucet without using a wrench?
While using a wrench or specialized tools like a basin wrench is the most effective method for removing a kitchen tap, there are a few alternative methods you can try if a wrench is not available. One option is using a pair of adjustable or locking pliers to provide leverage and grip on the mounting nuts. Another method is to use a large pair of channel lock pliers or pipe wrenches to carefully loosen the nuts. However, it’s important to exercise caution when using these alternative methods to avoid damaging the tap or the surrounding area. It’s generally recommended to use the appropriate tools for the task to ensure a safe and successful removal process.
Can I remove a kitchen faucet by hand without any tools?
Removing a kitchen faucet by hand without any tools can be challenging and may not be feasible in most cases. Faucets are typically secured tightly to the sink or countertop using mounting nuts or bolts. These connections require significant torque to loosen and remove, which is difficult to achieve by hand alone. Using tools such as a basin wrench, adjustable pliers, or screwdrivers provides the necessary leverage and grip to effectively remove the faucet. Therefore, it is highly recommended to have the appropriate tools on hand when attempting to remove a kitchen faucet to ensure a successful and safe removal process.
The Final Thought
Removing a kitchen faucet without a basin wrench may seem like a daunting task, but it can be done with a few simple tools and techniques. By following the steps outlined in this article, you can successfully remove your old tap and install a new one without the use of a basin wrench. Remember to turn off the water supply before beginning and take your time to avoid damaging any components. With some patience and effort, you can upgrade your kitchen sink with ease. So go ahead and give it a try!


