

Installing a kitchen faucet is a crucial task to ensure the proper functioning of your kitchen workspace. A well-installed faucet not only enhances the aesthetics of the kitchen but also plays a vital role in facilitating daily chores. It serves as a primary source for water, used in tasks ranging from dishwashing to food preparation. A properly installed faucet contributes to a seamless and efficient kitchen experience. In this guide, we will provide an overview of the installation process, guiding you through the steps to successfully replace or install a kitchen faucet, allowing you to enjoy a functional and aesthetically pleasing kitchen fixture.
Gathering Tools and Materials

Proper preparation is key to a successful kitchen faucet installation. Having the necessary tools and materials ready ensures a smooth and efficient process.
Necessary tools
Adjustable wrench
This versatile tool is essential for tightening and loosening nuts and bolts. It allows for easy adjustment to various sizes, providing flexibility during installation.
Plumber’s tape
Also known as Teflon tape, it is used to seal threaded connections, preventing leaks. Applying this tape ensures a secure and watertight seal in the plumbing components.
Plunger
While not directly related to faucet installation, having a plunger on hand is wise. In case any unforeseen clogs occur during the process, a plunger can help address minor plumbing issues quickly.
Bucket
Having a bucket nearby is practical for catching any excess water that may spill during the installation. It helps maintain a clean workspace and prevents potential water damage.
Teflon tape
Similar to plumber’s tape, Teflon tape is useful for creating a watertight seal in threaded connections. It’s an additional layer of protection to guard against leaks.
Required materials
New kitchen faucet
Select a faucet that suits your kitchen design and meets your functional requirements. Ensure it comes with all necessary components for installation, including handles, spout, and mounting hardware.
Flexible supply lines
These flexible hoses connect the faucet to the water supply. Ensure they are of the correct length and compatible with your plumbing system. Flexible supply lines make installation easier and accommodate variations in plumbing configurations.
Plumber’s putty
This soft, moldable material is used to create a waterproof seal between the sink and the faucet. It’s particularly beneficial for sealing the base of the faucet to prevent water from seeping underneath.
Silicone caulk
Applying silicone caulk around the edges of the faucet base provides an additional layer of protection against water infiltration. It also contributes to a neat and finished appearance.
Preparation
Before diving into the installation process, taking the time to prepare the workspace and understand the manufacturer’s instructions is crucial.
Turn off the water supply
Begin by turning off the water supply to the sink. Locate the shut-off valves under the sink and turn them clockwise until fully closed. This prevents water from flowing while you work, minimizing the risk of leaks and water damage.
Clear workspace
Remove any items from under the sink and clear the surrounding area. This provides ample space to maneuver during the installation and reduces the likelihood of damaging nearby objects.
Read manufacturer’s instructions
Each faucet model may have specific requirements and instructions provided by the manufacturer. Take the time to thoroughly read and understand these instructions before proceeding. This ensures that you follow the correct steps and use the appropriate components for a successful installation. Following the manufacturer’s guidelines also helps in maintaining the warranty and ensuring optimal performance.
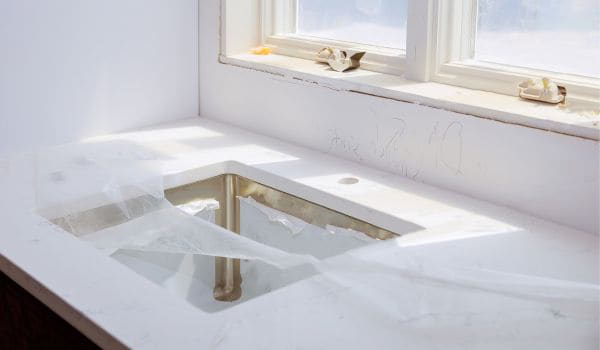
Removing the Old Faucet

Removing the old is a crucial step in the installation process and requires careful attention to avoid damage and ensure a clean transition to the new fixture.
Disconnecting water supply lines
Start by using the adjustable wrench to loosen and disconnect the water supply lines attached to the old one. Place a bucket underneath to catch any residual water. Ensure both hot and cold water supplies are disconnected.
Removing the mounting nuts
Locate the mounting nuts securing them to the sink. These are typically located underneath the sink. Use the adjustable wrench to loosen and remove these nuts. In some cases, there may be additional hardware securing them; remove them as well.
Detaching the old faucet
With the water supply lines and mounting nuts detached, carefully lift the old from the sink. Be cautious not to damage the sink surface or any surrounding fixtures during removal.
Cleaning the sink surface
Once the old is removed, thoroughly clean the sink surface. Remove any old plumber’s putty, caulk, or debris that may be present. A clean surface ensures a proper seal for the new and enhances the overall aesthetics of the installation.
Installing the New Faucet

Now that the old faucet is removed, it’s time to install the new one. Carefully follow these steps to ensure a secure and leak-free installation.
Placing the new faucet in position
Position the new faucet in the mounting holes on the sink deck. Ensure the aligns properly with the sink and any additional features, such as a side spray or soap dispenser.
Securing the faucet with mounting nuts
From underneath the sink, secure the new in place by tightening the mounting nuts. Use the adjustable wrench to ensure a snug fit. Be cautious not to overtighten, as it could damage the or the sink.
Connecting the water supply lines
Attach the flexible supply lines of the new to the corresponding hot and cold water supply pipes. Use the adjustable wrench to tighten the connections, ensuring they are secure. Check for any signs of leaks before proceeding to the next step.
Applying plumber’s putty or silicone caulk
Depending on the design and manufacturer’s instructions, you may need to apply a plumber’s putty or silicone caulk. If required, carefully apply the putty or caulk around the base of the to create a watertight seal between the and the sink. Wipe away any excess material for a clean finish.
With these steps completed, you’ve successfully removed the old and installed the new one, bringing your kitchen one step closer to a refreshed and functional appearance.
Testing and Checking for Leaks

After installing the new, it is crucial to perform thorough testing to ensure a successful installation and prevent potential water damage.
Slowly turn on the water supply
Gradually turn on the water supply by reopening the shut-off valves. This gradual approach helps prevent sudden water surges and allows you to monitor for any immediate leaks.
Checking for leaks around connections
Inspect all the connections, including those between the water supply lines and the, as well as any threaded connections. Look for signs of water leaks, such as drips or puddles. If any leaks are detected, tighten the connections appropriately to address the issue.
Ensuring proper water flow
Test the by turning on both hot and cold water. Check for a steady and even flow from the spout. If the water flow is weak or irregular, it may indicate a blockage or an issue with the supply lines. Investigate and resolve any issues affecting water flow.
Additional Tips and Troubleshooting
In addition to the primary installation steps, consider these tips and troubleshooting measures to ensure a smooth and functional installation.
Applying plumber’s tape to threaded connections
To further enhance the seal in threaded connections, consider applying the plumber’s tape. Wrap the tape clockwise around the threads to create a tight and secure seal, minimizing the risk of leaks.
Adjusting the faucet handles and spout
After testing, check the alignment and operation of the handles and spout. Ensure they move smoothly and without resistance. Adjust the handles and spout orientation if needed, following the manufacturer’s guidelines for adjustments.
Dealing with common installation issues
Address any common installation issues promptly. This may include adjusting the tightness of connections, reapplying the plumber’s putty or caulk if necessary, or resolving any unforeseen challenges that may arise during the testing phase.
By carefully testing and addressing any potential issues, you can confidently conclude the installation process, ensuring a leak-free and properly functioning kitchen. Regular maintenance and periodic checks can further extend the lifespan of the and contribute to the overall efficiency of your kitchen workspace.
Final Steps
As you approach the completion of your kitchen installation, take these final steps to ensure a polished finish and long-term functionality.
Cleaning up any excess caulk or putty
Inspect the area around the base for any residual plumber’s putty or silicone caulk. Use a clean, damp cloth to carefully wipe away any excess material. A neat and clean finish not only enhances the aesthetics but also contributes to a more professional-looking installation.
Testing the faucet for proper functionality
Perform a final test of to ensure proper functionality. Turn on both hot and cold water, checking for consistent flow and temperature control. Operate the handles and spout to confirm smooth movement without any resistance. Address any issues that arise during this final test to guarantee a fully operational and reliable.
Reviewing the manufacturer’s care and maintenance guidelines
Refer to the manufacturer’s care and maintenance guidelines provided with the. Manufacturers often provide specific instructions on how to clean, maintain, and troubleshoot their products. Following these guidelines ensures the longevity and optimal performance of your newly installed kitchen faucet.
Conclusion
Successfully installing a kitchen involves a series of meticulous steps aimed at achieving a functional and aesthetically pleasing outcome. From gathering the necessary tools and materials to removing the old and installing the new one, each step plays a crucial role in the overall process. A well-installed kitchen not only enhances the efficiency of your kitchen but also contributes to the overall design and cleanliness of the space. By following this comprehensive guide, you can confidently navigate the process of installing a kitchen, bringing a renewed sense of functionality and style to one of the central components of your kitchen. Remember, attention to detail and adherence to manufacturer recommendations are key to ensuring a successful and long-lasting installation.


