

Creating a kitchen island from base cabinets offers a practical and customizable solution for enhancing your kitchen space. This do-it-yourself project involves repurposing standard base cabinets into a functional island, providing additional storage, countertop space, and a focal point for your kitchen. The benefits of undertaking this project include cost-effectiveness, as it leverages existing cabinets, and the ability to tailor the to fit your specific needs and design preferences. With a blend of creativity and practicality, transforming base cabinets into a kitchen island can elevate both the functionality and aesthetics of your culinary workspace.
Planning and Preparation
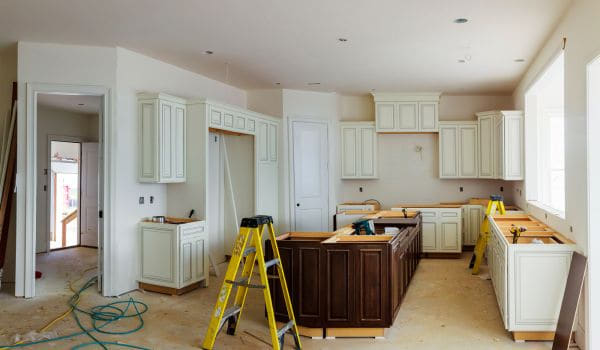
Before embarking on the transformation of base cabinets into a kitchen, meticulous planning and preparation are crucial. Begin by measuring the available space where the will be situated, taking precise dimensions of both width and length. This ensures that the resulting island seamlessly integrates into the kitchen layout, maximizing functionality.
Selecting the right base cabinets is equally important. Consider the size and style that aligns with your kitchen’s aesthetics and meets your storage requirements. Ensure the chosen cabinets are in good condition, as they will serve as the foundation for the structure.
Gathering the necessary tools and materials is the next step in this DIY endeavor. Arm yourself with a screwdriver for disassembling and reassembling components, appropriate screws for securing cabinets, a level to guarantee a straight and balanced structure, and the chosen countertop material for a polished finish. Additionally, have plywood on hand for potential additional support, reinforcing the structural integrity of the.
This meticulous planning and preparation stage lays the foundation for a successful and well-executed project, ensuring that each component is carefully considered and aligned with the vision for the ultimate kitchen island transformation.
Steps to Make a Kitchen Island from Base Cabinets
Remove doors and drawers from base cabinets
Begin the transformation process by carefully removing the doors and drawers from the selected base cabinets. Label each component to facilitate easy reinstallation later, ensuring a seamless and organized assembly.
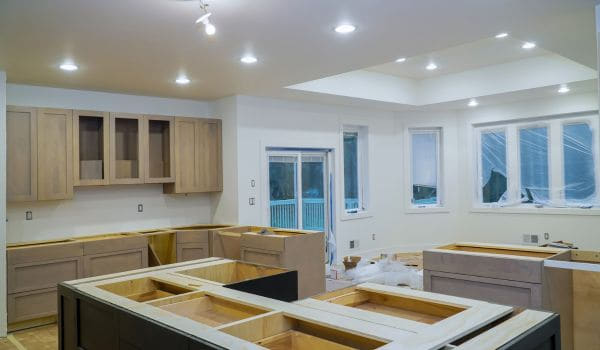
Determine the island’s layout
With the base cabinets ready, mark the designated location for each cabinet within the kitchen space. This step is crucial for achieving a well-proportioned and visually appealing.
Use a level to guarantee that the cabinets are aligned correctly, preventing any structural discrepancies in the final design.
Attach base cabinets
Secure the base cabinets to each other using screws, ensuring a sturdy and unified structure. Proper attachment is vital for the overall stability and durability of the.
Thoroughly check for stability after securing the cabinets together, making any necessary adjustments to maintain a level and balanced configuration.
Add additional support if necessary
For added stability in crafting a kitchen from base cabinets, incorporating plywood is a key step. Cut the plywood to match the dimensions of the cabinets, ensuring a snug fit that reinforces the entire structure. This additional layer not only fortifies the back of the cabinets but also offers crucial support for the countertop. Securing the plywood firmly in place is paramount, as it enhances the structural integrity of the base cabinets.
By providing robust reinforcement, the plywood minimizes the risk of sagging or instability, creating a sturdy foundation for the kitchen. This meticulous attention to structural support guarantees that the finished not only meets aesthetic expectations but also stands up to the demands of daily use.
Install countertop
Precision is key when cutting the selected countertop material to size for the kitchen. Ensure a seamless and accurate fit for the base cabinets, enhancing both the visual and functional aspects of the. This meticulous sizing contributes significantly to the overall aesthetic appeal of the finished project. Once the countertop is appropriately tailored, the next crucial step is to securely attach it to the base cabinets.
Utilize suitable methods and materials to guarantee a robust connection, creating a polished and functional work surface. This secure attachment not only ensures the longevity of the island but also provides a stable and reliable platform for various kitchen activities, from food preparation to casual gatherings, making the a central and functional feature in the kitchen space.
Reinstall doors and drawers
Once the structural elements of the kitchen island are in place, the final phase involves reinstalling the previously labeled doors and drawers onto the base cabinets. Adjust each component as necessary to achieve proper alignment and symmetry, ensuring a cohesive and visually appealing appearance. Take the time to confirm that all doors and drawers function correctly, addressing any adjustments needed for seamless operation.
This meticulous attention to detail during the reinstallation process completes the final touches of the assembly, elevating the island to its fully functional state. By following these comprehensive steps, you ensure a systematic and successful transformation of base cabinets into a well-constructed and aesthetically pleasing kitchen island. The result is a versatile addition to your kitchen space that not only enhances its form but also elevates its overall functionality.
Finishing Touches
Paint or finish the kitchen island
After the structural elements are securely in place, the next step involves adding the finishing touches that will contribute to its overall aesthetic appeal and durability. Painting or finishing the island is a critical aspect of this process. Choose a paint color or finish that complements the existing decor while providing protection against daily wear and tear.
Selecting a high-quality paint or finish is essential for longevity. Water-resistant and easy-to-clean finishes are particularly beneficial in an environment where spills and splashes are common. Consider consulting with a paint professional to ensure the chosen finish is suitable for the material of your base cabinets and countertop.
Add decorative elements (optional)
Molding
Incorporating molding into the design of your can elevate its visual appeal and add a touch of sophistication. Molding can be applied to the edges of the countertop or along the base of the island, serving both a decorative and functional purpose. Crown molding, for instance, lends a classic and elegant look, while simpler styles can provide a more modern and streamlined appearance.
Trim
Adding trim to the edges or base of the contributes to a polished and cohesive finish. Trim not only conceals any gaps between the cabinets and countertop but also introduces a decorative element. Explore different trim styles to find one that complements your overall design, creating a seamless transition between the and the surrounding space.
Install any additional features
The customization of your doesn’t stop with its basic structure. Consider incorporating additional features that enhance its functionality and align with your specific needs.
Hooks
Installing hooks on the sides or ends of the island provides a convenient spot to hang utensils, towels, or even pot holders. This not only frees up cabinet space but also adds a practical and accessible storage solution.
Shelves
Integrate shelves beneath the countertop for added storage. These can be utilized to store cookbooks, decorative items, or even appliances, keeping your workspace organized and clutter-free. Adjustable shelves offer flexibility, allowing you to adapt the island’s storage to changing needs over time.
These additional features contribute to the versatility of the, turning it into a multifunctional hub that goes beyond its initial purpose.
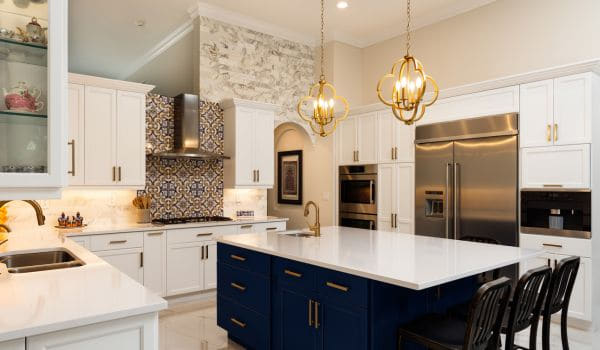
Conclusion
In concluding the transformation, take a moment to appreciate the finished product and reflect on the benefits of the DIY project. The journey from repurposing base cabinets to crafting a personalized one is not just a practical endeavor; it’s an opportunity to express your creativity and design preferences. Examine the completed from all angles, ensuring that each component is securely in place and that the island aligns seamlessly with the overall layout. Confirm that the paint or finish is even and that any decorative elements enhance the island’s visual appeal.


