

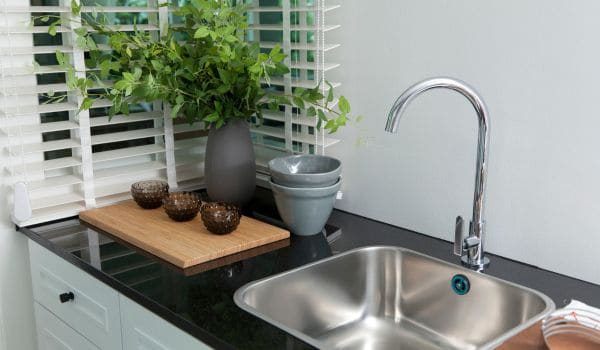
A black kitchen sink can serve as a stunning focal point in your home, merging both elegance and functionality. However, maintaining its pristine appearance demands regular care. Learning how to clean a black kitchen sink properly is crucial not only for aesthetic reasons but also for hygiene. Over time, water spots, soap scum, and food particles can diminish its sleek allure. In this guide, we’ll navigate through the steps and tips to ensure your sink retains its luster and charm. Whether it’s made of granite, composite, or porcelain, we’ll show you how to keep your sink spotless, ensuring that it continues to enhance the heart of your home.
Gather Supplies

List of necessary cleaning supplies
Mild dish soap
Choose a gentle dish soap to avoid damaging the sink’s finish.
Baking soda
An effective natural abrasive that helps remove stains and odors.
Vinegar
White vinegar serves as a versatile cleaning agent, especially for tackling limescale deposits.
Soft sponge or cloth
Opt for non-abrasive materials to prevent scratches on the surface.
Old toothbrush
Useful for reaching tight corners and tackling stubborn stains.
Microfiber cloth or paper towels
These are ideal for drying and polishing the to achieve a streak-free shine.
Pre-cleaning Steps

Clear the sink of any dishes or debris
Begin the cleaning process by removing any dishes, food particles, or debris from the. This creates a clean canvas for the thorough cleaning to follow.
Run hot water to loosen any surface dirt
Turn on the hot water faucet and allow it to flow into the sink. The heat helps soften and loosen surface dirt, making it easier to clean during the subsequent steps.
Create a cleaning solution by mixing mild dish soap with warm water
In a basin or container, combine a small amount of mild dish soap with warm water to create a gentle yet effective cleaning solution. This solution will be used to clean the entire surface, removing grease and general grime.
General Cleaning Steps

Apply the cleaning solution to the entire sink surface
Begin the cleaning process by generously applying the prepared cleaning solution to the entire surface of the black kitchen sink. Ensure an even distribution, covering all areas, including the basin, edges, and faucet.
Use a soft sponge or cloth to scrub the sink gently
Take a soft sponge or cloth and gently scrub the surface. The mild dish soap in the cleaning solution will help break down grease and grime, while the soft material ensures that the sink’s finish remains unharmed.
Pay extra attention to corners and edges
Given the intricate design of most kitchens, pay special attention to corners, edges, and around the faucet. These areas often accumulate residue and can be more challenging to clean. A soft sponge or an old toothbrush can be particularly useful in reaching these tight spaces.
Rinse the sink thoroughly with hot water
Once the scrubbing is complete, thoroughly rinse them with hot water. This step helps remove any remaining cleaning solution, soap, and loosened debris. Ensure all surfaces are well-rinsed to prevent residue buildup.
Dealing with Stains

Identify the type of stain
Before addressing stains, identify their nature. Different stains may require specific approaches for effective removal. Common stains include coffee, tea, or rust marks, each requiring a tailored cleaning method.
Apply a paste of baking soda and water to the stained area
For general stain removal, create a paste by mixing baking soda with water. The abrasive nature of baking soda helps lift stains without causing damage to the finish. Apply the paste directly to the stained areas, ensuring thorough coverage.
Let the paste sit for 15-20 minutes
Allow the baking soda paste to sit on the stains for a sufficient duration. This gives it time to break down and lift the stain from the surface of the sink.
Scrub the stain with a soft brush or old toothbrush
Using a soft brush or an old toothbrush, gently scrub the stained areas. The combination of the baking soda paste and gentle scrubbing helps dislodge and lift the stain effectively.
Rinse the sink to remove the baking soda residue
After scrubbing the stains, rinse the thoroughly with water to remove any residual baking soda paste. This ensures a clean and residue-free surface, leaving your black kitchen looking refreshed and stain-free.
Removing Limescale
Mix equal parts water and white vinegar
Limescale deposits can often mar the pristine appearance of a black kitchen. To tackle this issue, create a solution by mixing equal parts water and white vinegar. Vinegar’s acidic properties work effectively in breaking down and dissolving limescale buildup.
Soak a cloth or paper towel in the vinegar solution
Submerge a cloth or paper towel in the vinegar solution, ensuring it is thoroughly saturated. The choice of material should be gentle to prevent scratching the surface.
Place the soaked cloth on limescale deposits and let it sit for 15-20 minutes
Lay the soaked cloth or paper towel directly onto the areas with limescale deposits. Allow it to sit undisturbed for 15 to 20 minutes. This dwell time is crucial, as it allows the vinegar to penetrate and dissolve the stubborn limescale.
Scrub gently with an old toothbrush
After the soaking period, use an old toothbrush to gently scrub the limescale deposits. The soft bristles of the toothbrush provide effective scrubbing without causing damage to the. Focus on the areas where limescale is most prominent, ensuring a thorough removal.
Rinse the sink thoroughly
Once the scrubbing is complete, rinse the entire thoroughly with hot water. This step is essential to remove any residual vinegar solution and dislodged limescale particles, leaving them clean and free from mineral deposits.
Drying and Polishing
Use a microfiber cloth or paper towels to dry the sink
After successfully cleaning and rinsing, use a microfiber cloth or paper towels to dry all surfaces thoroughly. This step helps prevent water spots and ensures a streak-free finish.
Polish the sink with a few drops of olive oil on a soft cloth for added shine
For an extra touch of brilliance, add a few drops of olive oil to a soft cloth and gently polish the entire sink. The olive oil not only enhances the shine but also forms a protective layer, helping to repel water and resist future stains.
By addressing limescale and finishing with a polishing touch, you can regain its original luster, creating a visually pleasing and hygienic focal point in your kitchen.
Maintenance Tips
Regularly clean the sink to prevent build-up
One of the most effective strategies for preserving the beauty and functionality of a black kitchen is to establish a routine cleaning schedule. Regular cleaning prevents the accumulation of debris, stains, and bacteria, maintaining a hygienic environment. A quick wipe-down after each use can go a long way in preventing stubborn build-up and simplifying the cleaning process.
Avoid using abrasive cleaners that can damage the sink’s surface
While it may be tempting to use strong or abrasive cleaners to tackle tough stains, it’s essential to exercise caution. Harsh chemicals and abrasive cleaners can damage the surface of a black kitchen sink, leading to scratches or a dull finish. Opt for gentler, non-abrasive cleaning solutions to preserve the integrity and appearance over time.
Consider using a sink grid or mat to protect against scratches
To safeguard them from potential scratches caused by utensils, pots, or pans, consider using a grid or mat. These protective accessories create a barrier between the surface and any potentially abrasive items, minimizing the risk of scratches and maintaining the sleek look.
Conclusion
Maintaining a clean and aesthetically pleasing black kitchen sink involves a combination of proper cleaning techniques and preventive measures. By adhering to regular cleaning schedules and avoiding abrasive cleaners, you can prolong your life and preserve its elegant appearance. The use of protective accessories, such as grids or mats, further contributes to the longevity of the by preventing scratches and maintaining its original luster. A well-maintained black kitchen not only enhances the overall visual appeal of the kitchen but also promotes a healthier and more enjoyable cooking environment. Incorporating these maintenance tips into your kitchen routine ensures that your black remains a durable and stylish centerpiece, contributing to the overall charm and functionality of your kitchen space.


