
Maintaining a clean kitchen sink is crucial for both hygiene and aesthetics in the heart of any home. The kitchen sink serves as a hub for various food-related activities, from washing dishes to preparing ingredients, making it susceptible to grime, stains, and unpleasant odors. A clean sink not only promotes a healthier cooking environment by preventing the growth of harmful bacteria but also enhances the overall visual appeal of the kitchen. In this guide, we will specifically address the unique challenges of cleaning black kitchen sinks, providing effective tips and techniques to ensure their pristine condition and a stylish kitchen ambiance.
Gather Supplies

To effectively clean your black kitchen sink, it’s essential to gather the right cleaning supplies. This ensures that you have the necessary tools to tackle various stains and maintain the sink’s pristine appearance.
List of Cleaning Supplies
Dish Soap
Use a mild dish soap to break down grease and remove general grime.
Baking Soda
Ideal for gentle scrubbing and removing stains without scratching the sink’s surface.
Vinegar
White vinegar serves as an effective solution for tackling limescale and hard water stains.
Soft Sponge or Cloth
A non-abrasive sponge or cloth helps prevent scratches on the sink while effectively cleaning the surface.
Old Toothbrush
Handy for reaching into corners and crevices, especially useful for detail work around faucets and drains.
Microfiber Cloth
Perfect for drying the sink and providing a streak-free finish for a polished look.
Pre-Cleaning Steps

Before diving into the cleaning process, it’s crucial to take a few preliminary steps to set the stage for effective cleaning.
Remove any Dishes and Debris from the Sink
Clear the sink of dishes, utensils, and any debris. This allows for easy access to the entire sink surface.
Run Hot Water to Loosen the Surface Dirt
Turn on the hot water and let it run for a few minutes. The heat helps loosen dirt and grease, making it easier to clean.
Plug the Drain to Fill the Sink with Water
For a more thorough cleaning session, plug the sink drain and fill the basin with water. This helps in soaking and softening stubborn stains, ensuring a more effective cleaning process.
Basic Cleaning
Once you’ve gathered your supplies and completed the pre-cleaning steps, it’s time to embark on the basic cleaning process to restore your black kitchen cleanliness.
Apply Dish Soap Directly to the Sink Surface
Squeeze a small amount of dish soap directly onto the sink surface. Ensure even distribution, focusing on areas with visible stains or grime.
Use a Soft Sponge or Cloth to Scrub the Entire Sink
With a soft sponge or cloth, gently scrub the entire surface. Apply moderate pressure, especially on areas with stubborn dirt. Be mindful of the finish to avoid scratches.
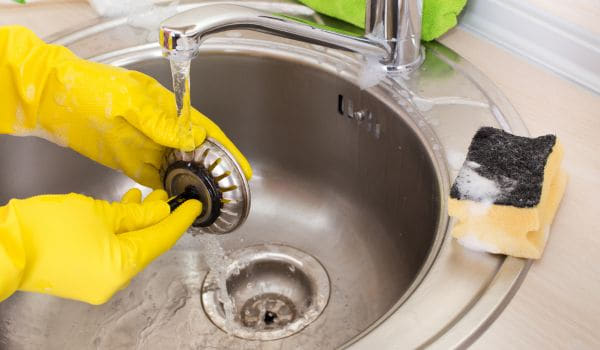
Pay Attention to Corners, Edges, and Around the Faucet
Use the sponge or an old toothbrush to reach into corners, edges, and around the faucet. These areas often accumulate residue, and thorough cleaning ensures a spotless result.
Rinse Thoroughly with Hot Water
Once the is scrubbed, rinse it thoroughly with hot water. This step helps wash away soap residue and any remaining dirt, leaving the clean and fresh.
Stain Removal

For targeted stain removal and addressing discolored areas, a specific approach is necessary.
Sprinkle Baking Soda Over Stains or Discolored Areas
Identify stained or discolored areas and sprinkle a generous amount of baking soda over them. Baking soda’s mild abrasive properties aid in lifting stains without harming the surface.
Scrub Gently with a Soft Sponge or an Old Toothbrush
Using a soft sponge or an old toothbrush, gently scrub the stained areas. Focus on applying consistent yet gentle pressure to avoid scratching the sink.
Rinse with Water to Remove Baking Soda Residue
After scrubbing, rinse thoroughly with water to remove any remaining baking soda residue. This step ensures a clean and residue-free surface, leaving your black kitchen looking refreshed and stain-free.
Tackle Limescale and Hard Water Stains

When dealing with limescale and hard water stains on your black kitchen, a targeted approach using a vinegar solution can be highly effective.
Mix Equal Parts Water and White Vinegar in a Spray Bottle
In a spray bottle, combine equal parts water and white vinegar. This solution harnesses the acidic properties of vinegar to break down limescale and hard water deposits.
Spray the Solution onto Limescale or Hard Water Stains
Directly spray the vinegar solution onto areas affected by limescale or hard water stains. Ensure thorough coverage to allow the solution to penetrate the stains effectively.
Allow it to Sit for 15-20 Minutes
Let the vinegar solution sit on the stains for 15 to 20 minutes. This dwell time allows the acid to dissolve and loosen the mineral deposits, making them easier to remove.
Scrub with a Soft Sponge or Toothbrush
Using a soft sponge or toothbrush, gently scrub the treated areas. This mechanical action, combined with the vinegar solution, helps lift and remove limescale and hard water stains.
Rinse Thoroughly with Water
After scrubbing, rinse the thoroughly with water to eliminate any remaining vinegar residue and debris. This step ensures a clean and residue-free finish.
Polish and Shine
To add a final touch of brilliance to your black kitchen sink, polishing and shining are key.
Dry the Sink with a Clean, Dry Microfiber Cloth
After cleaning, dry the completely with a clean and dry microfiber cloth. Removing excess moisture helps prevent water spots and keeps the looking pristine.
Apply a Few Drops of Olive Oil or Mineral Oil to a Cloth
Dab a soft cloth with a few drops of olive oil or mineral oil. These oils act as natural polishes and help enhance the sink’s shine.
Buff the Sink to Add Shine and Prevent Water Spots
Gently buff the surface with the oiled cloth to add shine and create a protective barrier against water spots. This step leaves your black kitchen looking glossy and well-maintained.
Maintenance Tips
Maintaining the pristine condition of your black kitchen involves adopting thoughtful practices to safeguard its appearance and functionality. Here are key maintenance tips to keep your looking sleek and performing at its best.
Avoid Abrasive Cleaners that can Damage the Sink Surface
Harsh abrasive cleaners and scouring pads can compromise the finish of your black kitchen sink. Opt for non-abrasive, pH-neutral cleaning solutions to effectively remove dirt without causing damage. This ensures the longevity of the elegant appearance.
Clean Regularly to Prevent Buildup
Regular cleaning is paramount in preventing the accumulation of grime, stains, and bacteria. Establish a consistent cleaning routine, focusing on removing daily debris to avoid stubborn buildup. This not only maintains the hygiene but also preserves its aesthetic appeal over time.
Use a Sink Mat or Grid to Protect the Surface
Implementing preventive measures is crucial for protecting your from potential damage. Place a sink mat or grid at the bottom of the basin to act as a buffer against scratches caused by dishes, utensils, or heavy cookware. This simple addition goes a long way in preserving the integrity of the surface.
Incorporating these maintenance tips into your kitchen care routine ensures that your black sink remains a focal point of elegance. By avoiding abrasive cleaners, cleaning regularly, and using protective measures, you contribute to a clean and attractive kitchen space. Taking proactive steps to care for your not only enhances its visual appeal but also extends its lifespan, allowing you to enjoy a beautiful and functional kitchen for years to come.
Conclusion
The longevity and allure of your black kitchen hinge on diligent maintenance practices. By steering clear of abrasive cleaners and opting for gentle alternatives, you safeguard the sink’s surface from potential damage, ensuring it retains its sleek finish. Regular cleaning, integral to preventing the buildup of grime and stains, not only promotes hygiene but also preserves the sink’s aesthetic charm. The use of protective measures, such as mats or grids, acts as a proactive defense against scratches and dings, contributing to the sustained elegance. Through these maintenance strategies, your black kitchen becomes not only a functional element but a lasting centerpiece, elevating the overall appeal of your kitchen. Embrace these tips to create a harmonious and visually pleasing kitchen environment that stands the test of time.


