

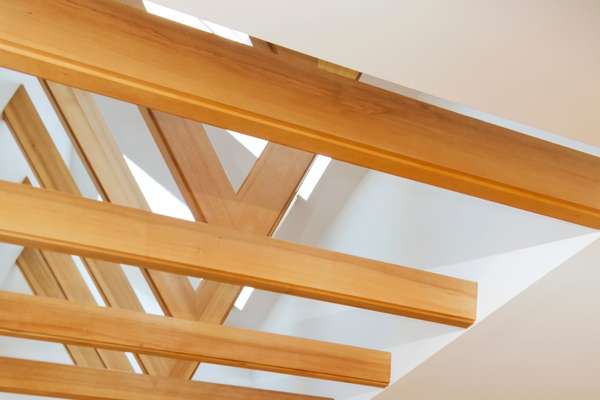
Wooden beams on the ceiling are a classic architectural feature that can add character and warmth to any room. These beams are often chosen for their natural wood grain, which provides a rustic and inviting ambiance. If you want to enhance the beauty of your timbered beams and make them a focal point in your interior design, painting them to accentuate the crop grain is an excellent option. In this article, we will guide you through the process of paint wooden beams on the ceiling to showcase the timber wood grain effectively.
What Paint Colors Enhance Natural Wood Grain?
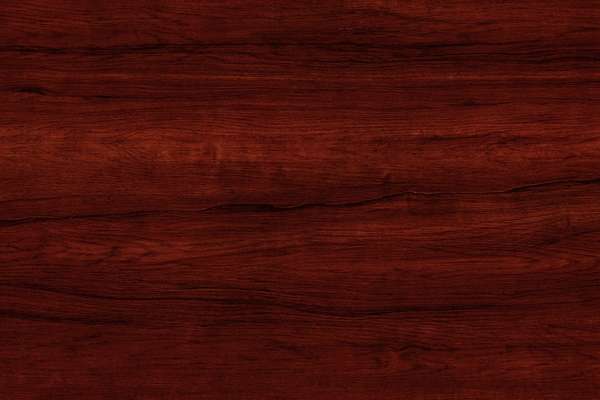
Choosing the right paint color is crucial when aiming to enhance the natural wood grain on your wooden beams. The beauty of these beams lies in their grain patterns and texture, so selecting a paint color that complements and accentuates these features is essential. Opt for earthy and warm tones such as soft browns, deep oranges, or muted yellows. These colors can create a harmonious blend with the timber grain, bringing out its natural appeal. Avoid vibrant or contrasting colors, as they might overpower the crop grain, diminishing its visual impact.
Is Sanding Necessary Before Painting Wooden Beams?
Sanding is an integral part of preparing wooden beams for painting. Before you apply any paint, it’s essential to sand the surface to ensure a smooth and even finish. Sanding not only removes imperfections but also helps the paint adhere better to the wood. It’s a critical step in achieving a polished look and showcasing the wood grain effectively. Start with a coarse-grit sandpaper to address any irregularities, and then switch to finer-grit sandpaper for a refined texture. Sanding in the direction of the timber grain is crucial to preserve its natural appearance and create an even canvas for your paint application.
Painted Wooden Beams On The Roof

1. Choosing The Right Paint

Choosing the right paint is a pivotal decision in your journey to highlight the natural wood grain on your ceiling beams. Water-based acrylic or latex paints are excellent choices, as they provide a smooth and even finish. These paints are also easy to work with and clean up, making your painting project more manageable. When selecting a color, remember that soft, earthy tones work best to enhance the timber grain’s beauty. Ensure you pick a high-quality paint that is formulated for use on wooden surfaces to achieve the best results.
2. Preparing The Ceiling And Beams

Proper preparation is the key to a successful wood grain enhancement project. The first step is to clean the wooden beams thoroughly. This ensures that no dust, dirt, or grease hinders the paint’s adhesion. After cleaning, the sanding process is essential for creating an even and polished surface. Sanding also prepares the wood to accept the paint evenly. Once your beams are clean and sanded, it’s time to apply a primer before the actual paint. The primer enhances adhesion and contributes to a consistent finish. With the surface properly prepped, you’re well on your way to creating a stunning timber grain effect that will elevate your interior design.
3. Priming The Wooden Beams

The priming process is a crucial step in ensuring the success of your wood grain enhancement project. After thoroughly cleaning and sanding the wooden beams, applying a primer is the next important task Wood grain paint. The primer serves several essential purposes. It creates a barrier between the wood and the paint, helping the paint adhere better. It also provides a consistent surface for the paint to bond to, preventing unevenness and streaks. Choose a high-quality primer specifically designed for wooden surfaces, and apply it evenly, allowing it to dry according to the manufacturer’s recommendations. A well-primed surface is the foundation for achieving a beautiful timber grain effect.
4. Techniques For Emphasizing Wood Grain

To create an authentic wood grain effect while paint your wooden beams, you can employ various techniques that mimic the natural grain patterns. One popular method involves using a timber graining tool. This tool can be used to drag through the wet paint, creating realistic grain lines. Practice on a spare piece of wood to perfect your technique before applying it to the beams. Another technique is to use a dry brush to add subtle streaks in the direction of the crop grain. Experiment with different tools and methods to find the one that best accentuates the timber grain and matches your desired aesthetic.
5. Drying And Curing

After you’ve applied the paint and any wood grain techniques, it’s essential to allow the beams to dry and cure properly. Drying time can vary based on factors like humidity and the type of paint used. Following the manufacturer’s recommendations is crucial to ensure thorough drying. During this stage, it’s important to avoid touching or disturbing the painted surface to prevent imperfections. Proper drying and curing time will result in a durable and long-lasting finish that showcases the crop grain effectively.
6. Applying Additional Coats

In some cases, achieving the desired wood grain effect may require multiple coats of paint. After the initial coat has dried, evaluate the results and determine if additional coats are necessary. It’s essential to be patient and meticulous during this stage. Apply each coat evenly and with a steady hand to maintain the timber grain effect. Allow each coat to dry before proceeding to the next. This process might require a bit of time and effort, but the end result will be well worth it, with the wood grain beautifully emphasized on your painted ceiling beams.
7. Cleaning Up
Once your wooden beams on the ceiling to are beautifully paint and the wood grain effect has been accentuated, it’s time to clean up the painting area. Properly cleaning up is essential to maintain the quality of your project. Start by removing any painter’s tape and protective coverings from the surrounding areas. Dispose of paint cans, brushes, and tools according to local regulations. If you used a timber graining tool or other specialty equipment, clean them thoroughly to prevent dried paint from affecting their future performance. Properly disposing of waste and cleaning up will leave your workspace tidy and ready for enjoyment.
8. Maintaining Painted Wooden Beams
Maintaining the painted wooden beams is essential to keep them looking their best over time. Regular dusting with a soft cloth or microfiber duster will prevent the accumulation of dirt and dust. If you encounter stubborn stains or marks, use a mild wood cleaner following the manufacturer’s instructions. It’s also a good practice to inspect the beams periodically for any signs of wear or damage. Addressing issues promptly, whether they are scuffs, scratches, or chipping paint, will help extend the life of your beautifully painted timbered beams.
Common Mistakes To Avoid
- Skipping the Preparation: Neglecting proper cleaning, sanding, and priming can lead to poor paint adhesion and a subpar finish.
- Rushing the Drying Process: Failing to allow sufficient drying and curing time can result in paint imperfections or damage.
- Overusing Wood Graining Tools: Using timber graining tools too liberally or without practice can lead to an unnatural and overdone crop grain effect.
- Choosing the Wrong Paint Color: Picking a paint color that doesn’t harmonize with the timber grain can detract from the natural beauty of the beams.
- Neglecting Maintenance: Failing to maintain painted wooden beams can lead to deterioration over time, requiring more extensive repairs.
What Brush Or Roller Is Ideal For Beams?

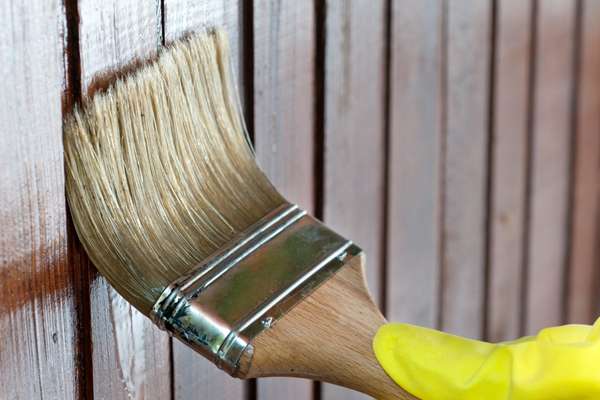
Selecting the right brush or roller is crucial when paint wooden beams on the ceiling to enhance their wood grain. For the edges and corners of the beams, a high-quality angled paintbrush is ideal. The angled design allows for precise and controlled application in tight spaces. For the flat surfaces of the beams, a roller is the preferred choice. A roller can cover larger areas quickly and evenly, ensuring a smooth and uniform finish. To achieve the best results, choose a roller with a nap appropriate for your chosen paint, whether it’s a water-based acrylic or latex paint. These tools, when chosen thoughtfully, will help you achieve a beautifully enhanced crop grain effect.
How Long Does It Take For Painted Wooden Beams To Dry Completely?

The drying time for painted wooden beams can vary depending on several factors, including the type of paint used, environmental conditions, and the number of coats applied. In general, water-based acrylic or latex paints typically dry faster than oil-based paints. However, it’s essential to follow the specific drying recommendations provided by the paint manufacturer.
On average, you can expect the first coat of paint to dry to the touch within 1-2 hours. However, to achieve complete and thorough drying, it’s recommended to wait 24-48 hours between coats. This time allows the paint to cure and harden properly, ensuring a durable and long-lasting finish.
Keep in mind that environmental factors such as humidity, temperature, and ventilation can influence drying times. For optimal results and to prevent any imperfections, be patient and allow the painted timber beams to dry fully before touching or applying add
Conclusion
Paint wooden beams on the ceiling to enhance the wood grain is a rewarding DIY project that can transform the aesthetic appeal of any room. This article has guided you through the entire process, from preparing the beams to selecting the right paint and tools, emphasizing the crop grain, and proper maintenance. By following the steps outlined and avoiding common mistakes, you can achieve a beautiful crop grain effect that complements your interior design.
Remember that the key to success lies in careful preparation, patience, and attention to detail. Whether you choose to embark on this project yourself or seek professional assistance, the end result will be well worth the effort. Your painted timbered beams will serve as a stunning focal point in your living space, showcasing the natural wood grain and adding a touch of warmth and character to your home.


