

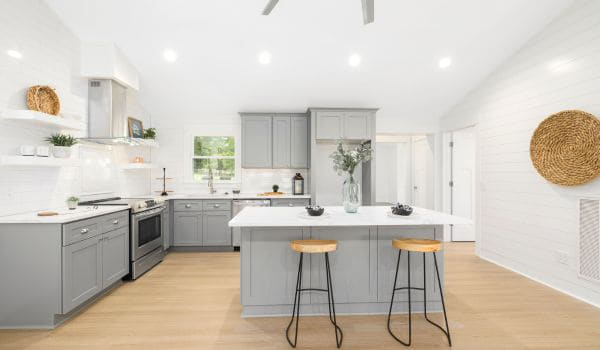
A kitchen island serves as a versatile and functional centerpiece within the culinary heart of the home. This project involves creating a customized kitchen island tailored to specific needs and preferences. By strategically incorporating a well-designed island, the kitchen space not only gains additional workspace but also becomes a hub for socializing, dining, and various culinary activities. The importance of a kitchen extends beyond its practical utility, as it can enhance the overall aesthetics and efficiency of the kitchen, providing a focal point that seamlessly blends style with functionality. As we embark on this endeavor, we aim to craft a kitchen island that not only complements the existing decor but also transforms the kitchen into a more inviting and dynamic environment.
Planning

Measure and assess available space
Begin by measuring the available kitchen space to determine the ideal dimensions for the island. Consider the traffic flow and accessibility in the kitchen while deciding on the size and shape of the island. Take into account the existing layout and appliances to ensure a seamless integration.
Select materials
Countertop material
Evaluate options such as wood, granite, or marble based on aesthetic preferences and budget. Consider the durability and maintenance requirements of each material.
Base material
Choose a suitable base material, such as wood, cabinets, or repurposed furniture, keeping in mind the overall design concept. Ensure the selected material complements the kitchen’s style and color scheme.
Gathering Materials and Tools
Create a materials list
Compile a detailed list of materials needed for both the base and countertop, considering the chosen materials from the planning phase. Include any additional components like hardware, screws, and adhesive.
Collect necessary tools
Saw
Select a saw appropriate for cutting the chosen materials.
Screwdriver
Ensure you have both flathead and Phillips screwdrivers for various assembly tasks.
Drill
Choose a drill suitable for the materials and any necessary hole sizes.
Sandpaper
Have different grits of sandpaper to smooth surfaces and edges.
Wood glue
Use a high-quality wood glue for strong and durable bonds.
Screws
Select screws of appropriate size and type for securing different components.
Paint or finish
If finishing the, gather appropriate paint or finishing materials based on the desired aesthetic.
Building the Base
Cut and assemble the frame
Begin by measuring and marking the base material according to the predetermined dimensions obtained during the planning phase. Precision is crucial to ensure a seamless fit within the kitchen space. Utilize the selected saw to cut the base material, taking care to follow the measurements accurately. Assemble the frame by aligning the cut pieces, applying wood glue along the joints for added strength, and securing them with screws. Ensure the frame is square by measuring diagonally from corner to corner.
Install cabinets or storage components
If incorporating cabinets into the design, securely attach them to the assembled frame. Place them strategically, considering accessibility and functionality. Connect individual cabinets using screws to create a cohesive unit. Verify that the cabinets are level and plumb, making any necessary adjustments. Attach doors and drawers to the installed cabinets, ensuring smooth operation and proper alignment. Use appropriate hardware for a polished finish.
Adding the Countertop
Cut and shape the countertop material
Measure the dimensions of the assembled base to determine the required size for the countertop. Mark the countertop material accordingly, using the selected saw to make precise cuts. Consider any overhang or decorative edge details as part of the design. Shape the edges of the countertop to achieve the desired profile, whether it be a straight edge, beveled edge, or custom design. Use sandpaper to smooth any rough edges.
Attach the countertop to the base
Position the cut and shaped countertop onto the assembled base, ensuring a snug fit.
Secure the countertop to the base using screws, inserted from underneath to maintain a clean surface. Alternatively, apply a high-quality adhesive, following the manufacturer’s instructions for proper application. Utilize a level to confirm the evenness of the countertop surface. Make any necessary adjustments to achieve a level and stable platform. In the process of building the base and adding the countertop, attention to detail is key to a successful outcome. Taking the time to measure accurately, assemble components meticulously, and ensure level surfaces will contribute to the overall functionality and aesthetic appeal of the kitchen. This phase marks a significant step in the project, setting the foundation for the durability and long-term use within the kitchen space.
Finishing Touches
Sand the entire island
Begin by thoroughly sanding all surfaces of the kitchen, paying particular attention to areas where different materials meet. Focus on smoothing out any rough edges, imperfections, or uneven surfaces using progressively finer grits of sandpaper. This step is crucial for achieving a polished and professional appearance.
Apply finish or paint:
Select a finish or paint that complements the overall design and color scheme of your kitchen. Consider factors such as durability, ease of maintenance, and the desired aesthetic. Apply the chosen finish or paint using a brush, roller, or sprayer, following the manufacturer’s instructions. Ensure even coverage, and allow sufficient drying time between coats. If applying multiple coats, lightly sand between each coat to achieve a smooth and consistent finish. This enhances both the appearance and longevity of the kitchen.
Installation
Move the island into place:
Carefully relocate the completed kitchen to its designated position in the kitchen, ensuring it aligns with the original measurements and layout. Enlist the help of others to lift and move them, preventing damage to the finished surfaces.
Secure it to the floor
Depending on the chosen design and location, consider securing the kitchen to the floor for added stability. Use appropriate fasteners such as screws or brackets to anchor securely to the floor, preventing any unintended movement or tipping. The finishing touches and installation phases are pivotal for transforming the kitchen from a construction project into a functional and aesthetically pleasing centerpiece. By meticulously sanding, applying finishes, and ensuring secure placement, you enhance the visual appeal while promoting its longevity and usability within the kitchen space. As you complete these final steps, take pride in the craftsmanship that has gone into creating a customized kitchen tailored to your preferences.
Optional Features
Add electrical outlets
Assess the kitchen’s intended use and determine if electrical outlets are required for appliances, charging devices, or other purposes. Hire a licensed electrician to install outlets, ensuring compliance with local building codes and safety standards.
Install lighting fixtures above the island
Choose lighting fixtures that complement the overall design and provide adequate illumination for tasks performed on the. Hire a qualified electrician to install and connect the lighting fixtures securely, considering both functionality and aesthetic appeal.
Incorporate additional storage or shelving
Evaluate the available space and identify opportunities to add storage solutions such as shelves, drawers, or cabinets. Customize storage components to fit seamlessly into the design, maximizing both form and function.
Maintenance and Care
Provide guidelines for cleaning and maintaining the kitchen island
Regularly clean the surfaces of the kitchen using a mild, non-abrasive cleanser to remove spills, grease, and debris. Follow manufacturer recommendations for cleaning and maintaining specific materials used in the construction of the, whether it be wood, granite, or other surfaces.
Recommend periodic checks and repairs if necessary
Periodically inspect the kitchen for signs of wear, damage, or structural issues. Address any issues promptly, whether it’s tightening screws, refinishing surfaces, or replacing worn-out components, to ensure the longevity and functionality of the island.
Conclusion
As you wrap up the construction and enhancement of your kitchen island, the addition of optional features and thoughtful maintenance practices contribute to its overall utility and aesthetic appeal. The incorporation of electrical outlets, lighting fixtures, and additional storage elements transforms the island into a multifunctional workspace. Regular maintenance and care ensure the longevity of your creation, preserving its beauty and functionality over time. By following these optional steps and guidelines, your customized kitchen island becomes not only a central hub for culinary activities but also a seamless and enduring part of your kitchen space.


