

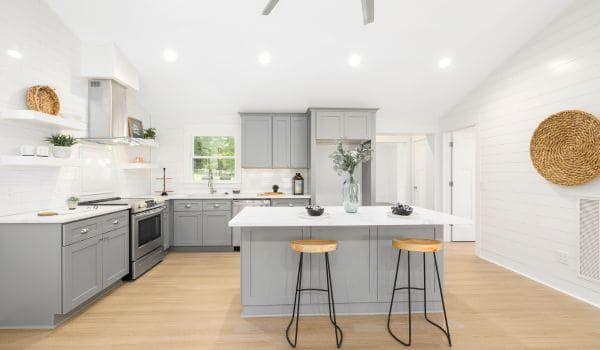
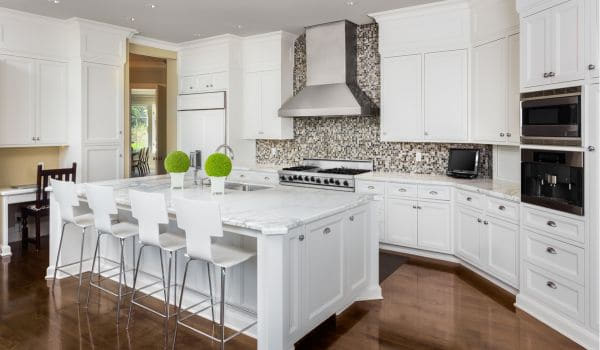
Embarking on a project to build a kitchen island can significantly elevate the functionality and appearance of your culinary space. This central piece serves as a multifunctional hub, ideal for food preparation, casual dining, or simply as an area for socializing. Crafting a kitchen island by yourself not only allows customization to your specific preferences and needs but also instills a sense of personal accomplishment. However, the journey from conception to completion involves meticulous planning and execution. Material selection, design alignment with your current kitchen layout, and practical considerations like storage and seating options are paramount. This guide aims to navigate you through the intricate process of building a kitchen island, ensuring that the end result is both practical and aesthetically pleasing, making your kitchen more inviting and efficient.
Planning and Design

Assessing Available Space
Measurements
Measure the designated area where the kitchen island will be placed, considering length, width, and height. Take precise measurements to ensure the island fits seamlessly into the available space.
Traffic Flow Considerations
Evaluate the kitchen layout to determine how the island will impact the flow of movement. Ensure there’s enough space around the island for comfortable navigation during cooking and socializing.
Determining the Purpose and Functionality
Cooking Space
Define the intended use of the island in cooking activities, such as meal preparation, chopping, or housing-specific appliances. Plan for the inclusion of a designated cooking area with appropriate features, like a built-in stove or oven.
Storage
Identify the storage needs for utensils, pots, pans, and other kitchen essentials. Determine the type and size of storage components, such as drawers or cabinets, based on your organizational requirements.
Seating Area
Decide whether the island will incorporate a seating area for casual dining or socializing. Consider the number of seats required and the preferred style (bar stools or chairs).
Materials and Tools
List of Required Materials
Countertop Material
Choose a suitable countertop material based on your design preferences and practical considerations (e.g., granite, quartz, wood).
Cabinet Base Material
Select a durable and aesthetically pleasing material for the cabinet base (e.g., plywood, MDF, hardwood).
Fasteners
Compile the necessary fasteners, such as screws, nails, or brackets, for securely assembling the components.
Finishing Materials
Gather finishing materials to enhance the appearance and protect the kitchen island, including paint, stain, or sealant.
Necessary Tools
Saw
Utilize a saw for cutting materials to the desired dimensions, including the countertop and cabinet components.
Drill
Employ a drill for creating holes for fasteners and ensuring a secure assembly.
Screwdriver
Have a screwdriver on hand for tightening screws during the construction process.
Level
Use a level to ensure the kitchen island is constructed evenly and avoids any imbalance.
Sandpaper
Employ sandpaper to smooth surfaces, ensuring a polished and finished look for the final product.
Building the Base
Constructing the Frame
Cutting and Assembling the Frame Components
To initiate the construction of the kitchen island base, start by cutting the frame components according to the measured dimensions. Use a saw to achieve precision in sizing the pieces, ensuring a snug fit within the designated space. Typically, the frame consists of horizontal and vertical elements forming a sturdy skeleton for the island. Assemble these components with careful attention to the design plan, creating a robust framework that will support the cabinets and countertop.
Securing the Frame with Fasteners
Once the frame components are accurately assembled, the next step involves securing them together using appropriate fasteners. Utilize screws or nails to ensure a strong and durable connection. Pay attention to the corners and joints, reinforcing them to enhance the overall stability of the frame. It is crucial to maintain proper alignment during this process, ensuring that the frame is square and level to prevent any issues during later stages of construction.
Attaching the Cabinets
Proper Alignment and Leveling
Moving on to the cabinet installation, place the cabinets onto the assembled frame with a focus on proper alignment and leveling. Ensure that the cabinets are symmetrically positioned within the frame, maintaining the intended design aesthetics. Use a level to confirm that the cabinets are horizontally and vertically aligned, making necessary adjustments to achieve a balanced and visually appealing result.
Securing Cabinets Together
With the cabinets in place, secure them together to create a unified base structure. Employ screws or other suitable fasteners to join the cabinets seamlessly, preventing any movement or separation. This step is crucial for the overall stability of the kitchen island. Pay special attention to the points where cabinets meet, ensuring a secure connection that will withstand the weight of the countertop and any items stored within the cabinets.
Installing the Countertop

Measuring and Cutting the Countertop Material
Begin the countertop installation by measuring the dimensions of the cabinet top. Transfer these measurements onto the chosen countertop material, whether it be granite, quartz, or wood. Use a saw to carefully cut the countertop along the marked lines, ensuring precision in achieving a perfect fit.
Attaching the Countertop to the Base
Adhesive Methods
Apply a suitable adhesive to the top surface of the cabinets. Carefully place the cut countertop onto the adhesive, ensuring proper alignment with the cabinet edges. Press down evenly to allow the adhesive to create a secure bond between the countertop and the base.
Screwing or Nailing from Underneath
For additional stability, secure the countertop to the base by screwing or nailing from underneath. Drill pilot holes to prevent any splitting of the countertop material, and then fasten the countertop securely to the cabinet frame. This method provides extra reinforcement, especially for heavier countertop materials. Ensuring proper alignment, stability, and secure connections at each step will result in a well-built kitchen island that not only enhances functionality but also adds aesthetic appeal to your kitchen space.
Adding Features
Incorporating Storage Solutions
Drawers
Integrate drawers into the kitchen island design to enhance its functionality. Consider various drawer sizes to accommodate different items, such as utensils, kitchen tools, or even pots and pans. Use quality drawer slides for smooth operation, and ensure proper alignment during installation.
Shelves
Implementing open shelves provides accessible storage for items that are frequently used or for displaying decorative kitchenware. Customize the shelf heights to accommodate various items, and ensure the shelves are securely attached to the base for stability.
Including Electrical Outlets or USB Ports
Consider the addition of electrical outlets or USB ports to enhance the island’s utility. Plan their placement strategically, keeping in mind the intended use, whether for small appliances, charging devices, or other electronic needs. Ensure compliance with safety standards and local building codes when incorporating electrical elements.
Adding Decorative Elements
Molding
Enhance the visual appeal of the kitchen island by adding decorative molding. Crown molding can be applied to the top edges of the cabinets or the underside of the countertop. Consider other types of molding, such as base molding or beadboard, to complement the overall design and style of your kitchen.
Trim
Utilize trim to create a polished and cohesive look. Apply trim along the edges of the cabinets or the countertop overhang, adding a decorative border. Choose trim that complements the overall aesthetic, whether it’s a simple and modern design or a more intricate, traditional style.
Finishing Touches
Sanding the Entire Island
Before applying any finishes, thoroughly sand the entire kitchen island to create a smooth and even surface. Start with coarse-grit sandpaper and progressively move to finer grits to achieve a polished result. Pay special attention to edges and corners for a professional finish.
Applying Paint or Stain
Select a paint or stain that aligns with your kitchen’s color scheme and design. Apply the chosen finish evenly across the entire surface, ensuring complete coverage. Consider multiple coats for durability, and follow the manufacturer’s instructions for drying times between coats.
Adding a Protective Finish
To protect the kitchen island from daily wear and tear, apply a protective finish. Options include varnish, polyurethane, or another suitable sealant. Ensure the finish is applied evenly, allowing sufficient drying time between coats. This protective layer not only enhances the appearance but also safeguards the island against moisture and stains, extending its longevity.
By carefully integrating storage solutions, functional features, and decorative elements, followed by meticulous sanding and finishing touches, your kitchen island will not only be a practical workspace but also a stylish focal point in your kitchen.
Installation in the Kitchen
Moving the Completed Island into Place
Once the construction of the kitchen island is complete, carefully move the assembled unit into its designated position. Enlist the help of others to ensure a smooth and secure relocation, preventing any damage to the island or surrounding fixtures.
Ensuring Proper Alignment and Stability
Once in place, meticulously check the alignment of the kitchen island within the designated space. Use a level to confirm that the island is horizontally and vertically aligned. Adjust the positioning as necessary to achieve a balanced and aesthetically pleasing result. Ensure that the island is stable and doesn’t wobble, making any adjustments to the base if needed.
Connecting Any Necessary Utilities
If your kitchen island incorporates electrical outlets or USB ports, ensure that these are properly connected to the electrical system. Hire a qualified electrician if necessary to ensure compliance with safety standards and local codes. Verify that all connections are secure and functional before regular use.
Maintenance and Care
Tips for Keeping the Kitchen Island in Good Condition
Avoid Excessive Weight
Be mindful of the weight placed on the island, especially on the countertop. Avoid overloading drawers and shelves beyond their recommended capacity to prevent structural issues.
Regular Cleaning
Clean the kitchen island regularly using a mild, non-abrasive cleaner suitable for the chosen finish. Wipe down surfaces, including the countertop and cabinets, to remove any spills or debris.
Prevent Moisture Damage
Protect the island from moisture by promptly wiping up spills. Use coasters or placemats under hot cookware or containers to prevent heat damage.
Cleaning and Regular Inspections
Inspect for Wear and Damage
Regularly inspect the kitchen island for any signs of wear, damage, or loose components. Address issues promptly to prevent further deterioration.
Deep Cleaning
Periodically perform a deep cleaning of the entire island. Remove items from drawers and shelves, clean internal surfaces, and check for any hidden issues.
Check and Tighten Fasteners
Ensure that all screws, bolts, and fasteners remain tight. Periodically check and tighten any loose connections to maintain the structural integrity of the kitchen island.
Conclusion
Building and installing a kitchen island involves careful planning, precise construction, and attention to detail. By following the outlined steps for installation, ensuring proper alignment and stability, connecting utilities if applicable, and implementing maintenance practices, your kitchen island will not only serve as a functional workspace but also remain a durable and attractive addition to your kitchen for years to come. Regular care and attention will preserve its beauty and functionality, making it a valuable asset in your culinary space.


