Clean rough wood ceiling beams Can be A challenging yet essential task To maintain The natural beauty And charm of your home’s interior. These exposed wooden beams add character And warmth To any space, but over time, they Can accumulate dust, dirt, And grime. Properly Cleaning them not only enhances their aesthetic appeal but also ensures they remain structurally sound. In this guide, We will explore effective techniques And tips on how To clean rough wood roof beams, restoring their luster And preserving The rustic elegance they bring To your living spaces.
Where To Find A Soft-Bristled Duster Brush
A crucial step In clean rough wood ceiling beams Is to start with The right tools, And one of The most essential tools for this task Is a soft-bristled duster brush. These brushes are readily available at most hardware stores And Can also be found online. When selecting A duster brush, opt For one with natural bristles or soft synthetic fibers To avoid scratching or damaging the wood surface. A soft-bristled duster brush Is gentle enough To remove loose dust And cobwebs without harming The wood’s texture, making It An ideal choice For The initial cleaning of your ceiling beams.
How Often Should You Clean Your Ceiling Beams?
The frequency of cleaning your rough wood roof beams largely depends On your specific environment And lifestyle. In general, It’s advisable To dust And clean them regularly, ideally every few months, To prevent The buildup of dust And grime. If You live In An area with higher humidity, You may need To clean them more often To prevent mold And mildew growth. If your home experiences heavy foot traffic or You have A fireplace that emits soot, more frequent cleaning may be necessary. Regular maintenance not only keeps your beams looking their best but also ensures they remain In good condition over The long term.
When Should Ceiling Beams Be Sanded/Refinished?
While regular cleaning Can help maintain The appearance Of your rough wood roof beams, there may come A time when they require more intensive care. Sanding And refinishing are typically necessary when The wood shows signs Of wear, such As surface stains, scratches, Or A faded finish. It’s recommended To sand And refinish your ceiling beams every 5 to 10 years, Depending on the level of wear Andrew And The type of finish applied. This process involves gently sanding The surface To remove imperfections and then applying A fresh coat of finish To protect and enhance the wood’s natural beauty. Properly timed refinishing Can extend The lifespan of your ceiling beam And keep them looking stunning For years to come.
Understanding The Importance Of Cleaning

Cleaning rough wood roof beams might seem like A daunting task, But It’s a crucial aspect Of home maintenance. These beam, With their natural And rustic charm, can accumulate dust, Cobwebs, And grime over time. Cleaning them not only enhances their visual appeal but also contributes To A healthier indoor environment by removing potential allergens And preventing The growth Of mold or mildew. Regular cleaning helps maintain The structural integrity Of The wood, ensuring that your ceiling beam remain sturdy And safe. So, understanding The importance of this task Is The first step towards preserving The beauty And functionality Of your wooden beams.
Preparing For The Cleaning Process
Before embarking on The cleaning journey for your rough wood roof beams, It’s essential To prepare adequately. Start by moving furniture or any items that might obstruct your access To The beams. Cover the floor and any nearby furniture with drop cloths Or plastic sheets To protect them from dust And cleaning solutions. Additionally, If You have any decorative items or fixtures hanging from The beam, carefully remove them To ensure A thorough And efficient cleaning process. Proper preparation sets The stage For a smooth And effective cleaning operation.
Gathering The Necessary Supplies
To clean your ceiling beams effectively, It’s vital To gather The necessary cleaning supplies. Depending on The level of dirt and grime, You may need A combination of tools. Soft-bristled duster brushes are excellent For removing loose dust And cobwebs. A vacuum cleaner with A brush attachment can help with more stubborn dirt and debris. For deeper cleaning, A of warm water And mild dish soap Is generally safe For wood surfaces. Additionally, microfiber cloths Or soft sponges are suitable For wiping down The beam. If your beams have A finish or stain, make sure To use A cleaning solution compatible with that specific type of finish. By gathering The right supplies, You’ll be well-prepared To tackle The cleaning process efficiently and effectively, leaving your rough wood roof beam looking refreshed And inviting.
Rough Wood Cleaning Process
1. Dusting And Removing Loose Debris

The first step In clean rough wood ceiling beams Is To address The accumulation Of dust And loose debris. Begin by using A soft-bristled duster brush or A vacuum cleaner with A brush attachment To gently sweep away the surface dust and cobwebs. Be meticulous In your approach, paying attention To corners And crevices. Dusting regularly helps maintain The beams’ appearance And prevents dust from settling deeper into The wood grain.
2. Removing Stubborn Stains
Stubborn stains On your ceiling beams may require A bit more effort To remove. Start by mixing A mild cleaning solution of warm water and A few drops Of dish soap. Dampen A soft cloth or sponge with the solution, wring It out To avoid excessive moisture, And gently blot or rub The stained area. Avoid using abrasive materials or harsh chemicals, As these Can damage The wood. If The stain persists, you can try a mixture of equal parts water and white vinegar For a natural stain remover. Always test any cleaning solution on An inconspicuous area of The wood first to ensure It doesn’t cause any damage.
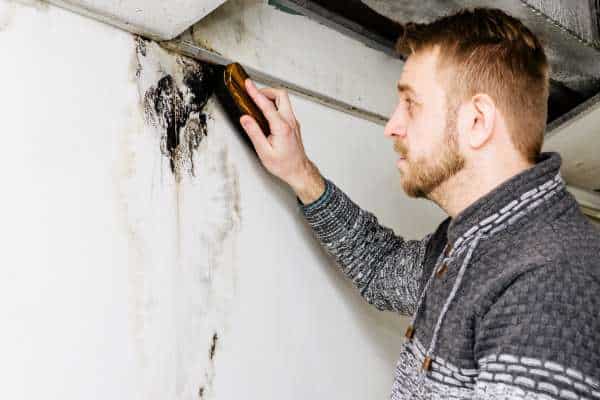
3. Removing Mold And Mildew
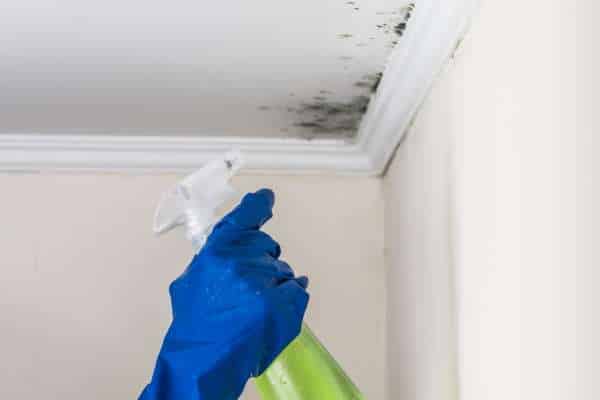
Addressing mold And mildew on rough wood roof beams Is essential not only For aesthetics but also For health reasons. To tackle this issue, prepare A solution of one part white vinegar To one part water or hydrogen peroxide. Apply this mixture To The affected areas using A sponge or cloth, being careful not To oversaturate the wood. Allow The solution to sit for A few minutes to break down The mold or mildew. Then, gently scrub the area To remove The growth. Rinse with clean water And thoroughly dry The wood To prevent future mold growth. Ensure proper ventilation In the room To discourage mold from returning. Regularly inspect your beams For signs of moisture And address any leaks or humidity issues promptly To prevent mold And mildew from recurring.
4. Cleaning High And Hard-To-Reach Areas

Clean high and hard-to-reach areas of your rough wood ceiling beams Can be challenging but Is essential For A thorough cleaning process. To tackle these areas, consider using an extension pole with your duster brush or vacuum cleaner attachment. Alternatively, A sturdy ladder or scaffolding may be necessary To access the beam located at a considerable height. Be cautious when working at elevated levels, prioritize safety, And ensure your equipment Is stable And secure. Addressing these high And hidden areas ensures A comprehe clean, Damp cloth or sponge To wipe down The wood surfaces, removing any traces of The cleaning solution. Follow this by using A dry cloth or towel To thoroughly dry The wood. Proper drying helps prevent water damage and ensures that your rough wood roof beams maintain their natural beauty. Adequate ventilation In The room can also expedite The drying process.
6. Sanding And Refinishing

If your rough wood ceiling beams have suffered fr wear, scratches, or a faded finish, it may be necessary to sand and refinish them To restore their original luster. Start by gently sanding The wood surface to remove imperfections And create a smooth, even texture. Choose an appropriate grit sandpaper, typically starting with A finer grit and progressing to a coarser one If needed. After sanding, wipe away any dust and debris, And then apply A fresh coat of finish or stain to protect and enhance The wood. The choice of finish or stain depends on your desired aesthetic And The type of wood. Properly executed sanding And refinishing Can breathe new life into your above kitchen cabinets with high ceiling beams, revitalizing their appearance And longevity.
7. Adding A Protective Sealant
Once you’ve cleaned And, If necessary, sanded And refinished your rough wood ceiling beams, It’s A good idea To apply A protective sealant. This step helps safeguard The wood from future damage, such As moisture, stains, or UV radiation. The choice of sealant Can vary depending on your preferences and The type Of wood You’re working with. Options include polyurethane, varnish, or natural oil finishes. Apply The sealant evenly, following The manufacturer’s instructions, And allow It to dry completely. A protective sealant not only enhances the beams’ durability but also adds A subtle sheen, accentuating their natural beauty.
8. Maintaining Clean Ceiling Beams

Maintaining The cleanliness of your rough wood ceiling beams i’s An ongoing process. To keep them looking their best, establish A regular cleaning routine that aligns with your home’s specific needs. Dusting And removing loose debris should be performed periodically, And It’s a good practice To inspect For stains or signs Of wear during these sessions. Address any spills or stains promptly To prevent them from becoming permanent. Additionally, be vigilant about maintaining ideal indoor humidity levels to prevent mold And mildew growth. Regular maintenance ensures that your ceiling beam continue To impress with their aesthetic appeal And remain In excellent condition over time.
Enhancing The Aesthetic Appeal
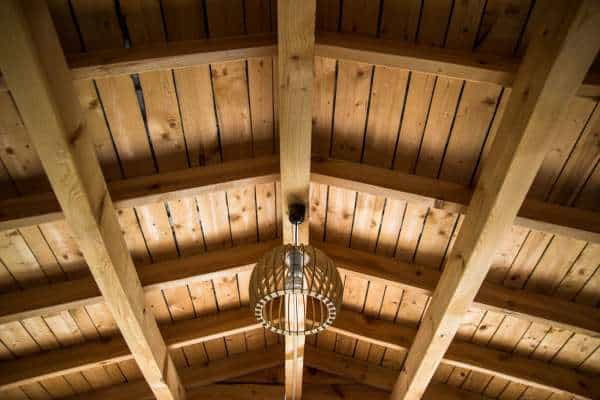
Beyond basic clean and maintenance, consider enhancing The aesthetic appeal Of your rough wood ceiling beams with thoughtful interior design choices. Lighting fixtures, decorative elements, And furnishings can all complement the natural beauty of the wood and make the beam a focal point of your living space. Experiment with different lighting angles to highlight the texture and character of The beams. You Can also play with color schemes and textures In The room To create A harmonious And inviting atmosphere. By integrating your ceiling beam into your overall interior design, you Can maximize their visual impact and create A truly stunning living environment.
Common Mistakes To Avoid
When cleaning rough wood roof beams, It’s important To be aware of common mistakes To ensure A successful cleaning process. One common mistake is using abrasive materials Or harsh chemicals that Can damage The wood’s finish And texture. Avoid such products And opt For gentle, wood-friendly cleaning solutions. Another mistake Is neglecting To protect The surrounding area from dust and cleaning solutions. Always cover furniture And The floor To prevent damage. Additionally, over-saturating The wood with water or cleaning solution Can lead to warping or staining, So use A damp cloth rather than soaking The wood. Lastly, neglecting regular maintenance Is A mistake, As It Can lead to The accumulation Of dirt, mold, or irreversible damage over time.
Where Can I Find Professional Beam Cleaners?
Finding professional beam cleaners can be relatively straightforward. Start by searching online for local cleaning companies that offer specialized services for wood surfaces, including ceiling beams. You Can also ask For recommendations from friends, family, or neighbors who may have had similar cleaning needs. Another option i’mms To check with home improvement Or restoration companies, As they often have expertise In cleaning And restoring wooden surfaces. Ensure that The professionals You choose have experience with rough wood ceiling beams And Can provide references Or examples Of their previous work.
Why Is Dusting Beams Before Cleaning Important?
Dusting beams before cleaning Is a crucial step because It helps prevent scratching and spreading of dust and dirt during the cleaning process. Dust and loose debris Can act As abrasive particles, and when they come into contact with The wood’s surface, they may create tiny scratches or marks. By dusting The beams first, You remove these loose particles, reducing The risk of damage To The wood when you proceed with further cleaning steps. Moreover, dusting ensures that your cleaning efforts are more effective because You’re not pushing dirt around or embedding It into The wood grain. This initial step sets the foundation For a thorough and gentle cleaning process that preserves the beauty of your rough wood ceiling beams.
Conclusion
Cleaning rough wood ceiling beams Is a vital aspect of maintaining the aesthetic appeal And structural integrity of your home’s interior. By following The right cleaning methods And avoiding common mistakes, You Can ensure that your beam continues to enhance The charm of your living spaces. Dusting before cleaning, selecting the appropriate cleaning solutions And tools, And addressing stains And mold promptly are essential steps In The maintenance process. Regularly maintaining clean beams And enhancing their aesthetic appeal through thoughtful design choices Can elevate The overall ambiance of your home. Whether You choose To undertake The cleaning yourself or enlist The services Of professional beam cleaners, the effort invested In preserving these unique architectural features Is well worth The lasting beauty And character they bring To your living environment.